Avoid Backward Prints: First vs Second Surface for Sign Shops
First surface printing puts ink on the side facing your viewer, so colors read strong and bold on solid materials like PVC, dibond, or foam board. Second surface printing puts ink on the back of a clear or translucent substrate, like acrylic or glass, so the viewer looks through the material to see the image, which shields the ink and adds a glassy sense of depth. Choose first surface for opaque materials and maximum punch; choose second surface for clear substrates where protection and a premium finish matter more than raw vibrancy.
TL;DR:
- First surface printing provides maximum color vibrancy and is suitable for opaque materials, with ink applied directly on the visible side.
- Second surface printing involves mirroring artwork on the backside of clear materials like acrylic or glass, offering protection and a deep, glassy finish.
- Proper file preparation, especially mirroring and layer sequencing, is critical to avoid backward images and ensure high-quality output.
- Substrate choice affects visual clarity and durability, with thicker panels creating noticeable depth and white ink opacity needing careful testing.
- The intended environment and touch frequency determine whether first surface, second surface, or dual surface printing is the best fit.
Table of Contents
- First Surface vs Second Surface: How Ink Order Actually Works
- Substrates, White Ink, and File Prep That Make or Break the Job
- Matching the Method to the Job: Windows, Interiors, and High-Traffic Signage
- Finishing, Installation, and Quality Checks That Prevent Reprints
- How Crispsign Decides Which Surface Fits Your Sign
- What I've Seen Go Wrong (And What I'd Default To)
- Ready to Order Signage Built the Right Way the First Time?
- Sources
- FAQ
First Surface vs Second Surface: How Ink Order Actually Works
Get the terminology right before you spec a job, because the two methods put ink in physically different places and that changes everything downstream.
First surface printing means the ink sits on the front of the material, the same side your customer sees and touches. Standard color inks go down first, and white ink prints on top when you need it to pop off a dark or clear background. It's the more intuitive method: what you print is what you see, no mirroring required.
Second surface printing flips that order. Ink goes on the back of a clear substrate like acrylic, polycarbonate, or glass, and the viewer looks through the material to see it. That means:
- Artwork must be mirrored horizontally before printing, or the finished piece reads backward.
- White ink prints last, behind the color layers, acting as a backing that keeps light from washing out the image.
- The substrate itself becomes a protective shield, since fingers and cleaning cloths never touch the actual ink.
Dual surface printing combines both: ink on the front and back of the same clear piece, separated by the thickness of the material. That gap creates a layered, almost three-dimensional look that neither method achieves alone.
Substrates, White Ink, and File Prep That Make or Break the Job
The substrate you pick decides more of the final look than most shops give it credit for. Clear acrylic and glass are the classic choices for second surface work because they're optically clean enough to print through without distortion. Polycarbonate holds up better outdoors and resists impact, which matters for high-traffic entryways. PET film and pressure-sensitive vinyl (PSV) work for both methods but behave differently: PSV applied first surface shows ink texture under raking light, while the same graphic mounted second surface behind glass looks smoother and richer.
Substrate thickness directly affects depth. A thin PET overlay barely separates front and back layers, while a half-inch acrylic panel creates a visible shadow gap between a second surface print and any element mounted behind it. Designers use that gap on purpose for award plaques and lobby logos.
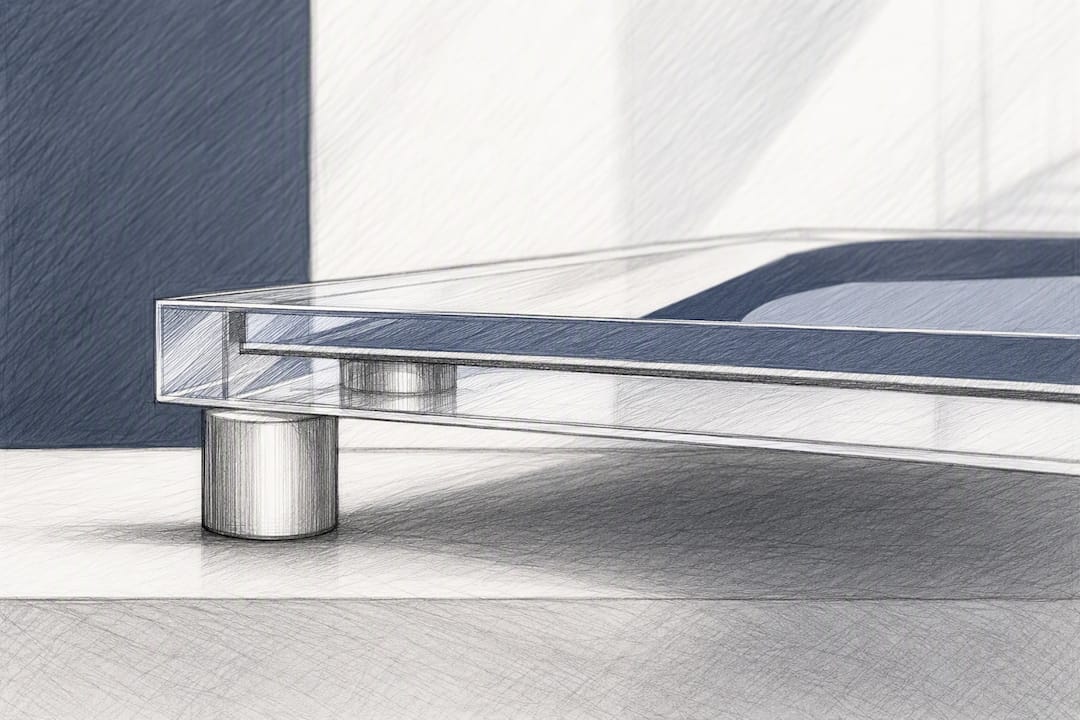
White ink is where most quality problems start. It needs enough opacity to block light bleed-through, but not so much that it flattens color vibrancy. Run a light-table check before full production: hold the printed panel up to a bright source and look for thin spots or streaking in the white layer.
A practical file-prep checklist for any second surface job:
- Mirror the entire artwork file before sending it to print.
- Lock your layer order: color first, white ink last, in that print sequence.
- Set cutlines and bleeds to match the final substrate size, not the printable area.
- Note the viewing side clearly on the job ticket so the install crew doesn't mount it backward.
Pro Tip: Print a small test tile with your exact white ink settings and view it against both a dark wall and a bright window before committing to a full production run. Lighting conditions change how opaque white ink actually looks.
Matching the Method to the Job: Windows, Interiors, and High-Traffic Signage
Picking a surface isn't a style preference. It's a decision driven by where the sign lives and who touches it.
For window graphics, the split comes down to which side of the glass the ink sits on. First surface window decals mount on the outside with adhesive on the back, which gives sharp, glare-free color but exposes the print directly to weather and vandalism. Second surface decals mount on the inside facing out, with adhesive on the front of the piece, trading a little color vibrancy for full protection from rain, UV, and passersby.
For premium interiors, awards, and standoff-mounted signage, second surface or dual surface printing wins almost every time. The acrylic itself protects the ink from fingerprints in a busy lobby, and the layered depth reads as higher-end than a flat printed panel.
For anything exposed to constant handling, hallway traffic, or outdoor weather, second surface protection earns its keep fast.
Before you finalize a job ticket, run through this:
- Which side will people actually view from?
- Will the sign sit under direct sun, fluorescent lighting, or spotlighting?
- How often will hands, carts, or cleaning crews contact the surface?
- Is it framed, standoff-mounted, or applied flat to glass?
Finishing, Installation, and Quality Checks That Prevent Reprints
Even second surface prints benefit from extra protection in high-abrasion environments. Lamination or a clear topcoat adds a buffer when a panel will be cleaned daily or mounted at hand height in a busy retail space, since the acrylic alone won't stop scuffs from careless handling.
Adhesive placement trips up more installers than any other step. First surface window graphics carry adhesive on the back and mount straight to the outside glass. Second surface pieces often carry adhesive on the front of the graphic, which then presses against the inside of the glass, meaning the mirrored image faces outward correctly once installed. Mixing these up is the single most common reprint cause shops report.
Turnaround and cost climb with every added production pass. Dual surface jobs take longer because they require two precisely aligned print runs, and thicker substrates add shipping weight that shows up on freight invoices.
Before any job ships, run these checks:
- Opacity test on white ink under bright light.
- Full color check viewed through the substrate, not just on a flat proof.
- Edge inspection for chipping, especially on cut acrylic.
- Confirmation that mirrored text reads correctly once flipped into position.
Shops that follow technical standards from trade organizations tend to catch these issues before a client ever sees the finished piece, and complex mounting jobs, like edge-lit acrylic, often benefit from a certified installer network rather than a general handyman crew.
How Crispsign Decides Which Surface Fits Your Sign
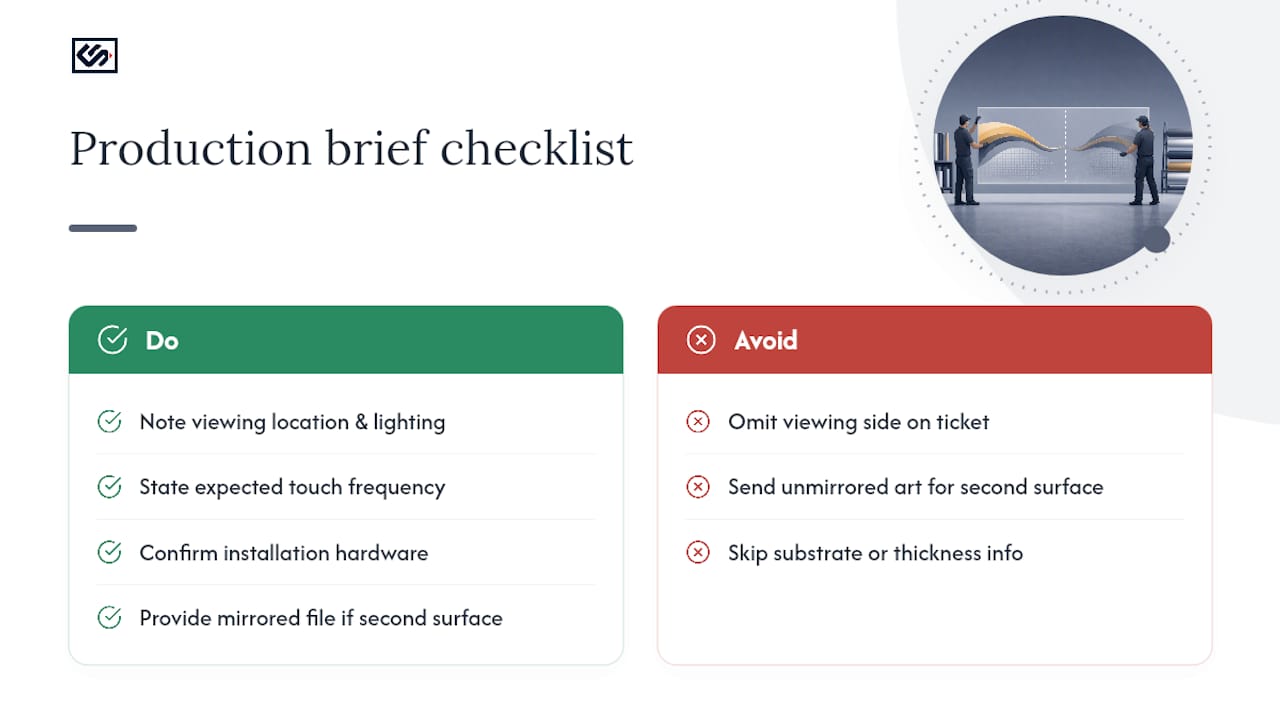
Every Crispsign order starts with a short brief: where will people view the sign, what's the lighting, how much will it get touched, and how will it be installed? Those four answers determine whether a lobby logo goes first surface, second surface, or dual surface before a single file gets mirrored.
For a wall-mounted acrylic panel in a reception area, that means confirming standoff hardware, wall material, and whether cleaning crews will wipe it down daily. For window vinyl, it means knowing which side of the glass faces the street.
If you're sending files to Crispsign or any production shop, hand off: your mirrored artwork (if second surface), exact substrate and thickness, viewing side noted on the ticket, and your installation timeline. That short list saves a reprint almost every time.
What I've Seen Go Wrong (And What I'd Default To)
The mistake I see most is a shop skipping the mirror step on rush jobs, then discovering backward text after the panel's already cut. A close second: thin white underprint that lets a dark wall bleed through a "white" logo. My default for standard storefront and lobby work is second surface acrylic when the piece will be touched or cleaned often, first surface for anything opaque that just needs bold color. Loop in your production team before finalizing files, not after.
— Nick
Ready to Order Signage Built the Right Way the First Time?
You've got the technical picture now: first surface for bold, opaque signage, second surface for protected, premium acrylic work. Crispsign builds both, along with the lobby panels, window vinyls, and wayfinding pieces that put these decisions into practice every day, all designed online and shipped nationwide with optional professional installation.
Before you order, have three things ready: your file specs (mirrored if second surface), your substrate choice, and which side of the piece will actually face your customers. That short prep list is the difference between a sign that arrives right and one that needs a redo. If you're outfitting a reception area or storefront entry, start with Crispsign's lobby signage line, which covers logos, panels, vinyl, and tabletop displays built to your exact specifications. Need something code-sensitive, like wayfinding near an accessible entrance? Check the ADA-compliant lobby signage options before you finalize your layout, since those specs affect mounting height and file prep from the start.
Sources
- First vs Second Surface Window Graphics: Advantages & Considerations
- Certifications | Printing Industries of America
FAQ
What is a second surface print?
A second surface print is ink applied to the back of a clear or translucent material, like acrylic or glass, so viewers see the image through the substrate. The material itself protects the ink from scratches and handling.
What does 1 to 2 sided printing mean in signage?
One-sided printing means ink appears on a single face of the material, whether that's first surface or second surface. Two-sided, or dual surface, printing means ink is applied to both the front and back of a clear substrate to create a layered, dimensional effect.
What are the two main types of surface printing?
The two main types are first surface printing, where ink sits on the front, viewer-facing side of the material, and second surface printing, where ink sits on the back of a clear substrate and is viewed through it. Dual surface printing combines both on a single clear panel.
What is the difference between surface printing and reverse printing?
Surface printing typically refers to first surface printing, where the ink is applied directly to the front face people see and touch. Reverse printing describes second surface printing, where artwork is mirrored and printed on the backside of a clear material so it reads correctly from the front.