Proofing Sign Designs Before Printing: A Complete Checklist
Proof sign designs before printing by running a three-step plan: preflight the file, choose the right proof type (soft, hard/contract, or press), and verify color, scale, and permit documentation before anything hits production. Skip any one of those three and you risk a sign that's the wrong color, unreadable from the street, or stuck in plan check for weeks.
Every sign project lives or dies on details most people never think to check. A logo that looks perfect on your laptop can shift three shades warmer once it's printed on white acrylic and lit from behind. A design that reads fine at arm's length can turn to mush at 40 feet. And a beautifully designed channel letter set can sit in a permitting queue because nobody submitted a wet-stamped structural calculation.
The proofing stage is where a sign project either gets locked in correctly or quietly sets itself up for a reprint, a rejection, or a repaint. Treat it as a checkpoint, not a formality.
Before you send a file anywhere, confirm these items:
- File preflight: fonts outlined, images at full resolution, correct color mode, bleed set.
- Proof type selected: soft proof for speed, contract proof for color-critical brand work, press proof for spot-color or first production runs.
- Color verification: ICC profile applied, ΔE tolerance checked against ISO 12647-7 guidance.
- Scale and legibility: mockup or scaled printout tested at the actual viewing distance.
- Permit documents: site plan, sign schedule, elevations, and structural calculations ready for submission, using a checklist format like the one from the City of San Diego.
Key Takeaways
Proofing a sign design correctly means running a clean preflight, picking the right proof type for the job's risk level, and locking in color, scale, and permit approval before production begins.
| Point | Details |
|---|---|
| Run preflight first | Fix fonts, resolution, color mode, and bleed before requesting any proof. |
| Match proof type to risk | Use soft proofs for low-risk jobs, contract proofs for brand colors, press proofs for spot colors and long runs. |
| Verify color with ΔE | Confirm contract proofs meet ISO 12647-7 tolerance of ΔE 3 or lower before approving. |
| Check scale in the real world | Print a full-scale mockup and view it at the intended distance before signing off. |
| Get permits moving early | Submit site plans, elevations, and wet-stamped structural calculations at the start, not after design approval. |
| Let Crispsign manage the workflow | Crispsign coordinates preflight, proofing, and documented approvals for storefront and illuminated signage orders. |
Table of Contents
- Soft Proofs vs Hard Proofs vs Press Proofs: Which One Do You Need?
- Preflight and File Prep: What to Check Before You Request a Proof
- How Do You Verify Colors Will Match Before Printing?
- Checking Scale, Legibility, and Material Effects Before You Print
- Permit and Structural Paperwork That Commonly Delays Sign Projects
- Building an Approval Workflow That Protects Everyone
- Cheap Physical Tests That Catch Problems Before You Commit
- Final Pre-Print Checklist and How Proof Choice Affects Your Timeline
- How Professional Sign Shops Actually Handle Proofing
- How CrispSign Handles Proofing So You Don't Have To Guess
- Sources
- FAQ
Soft Proofs vs Hard Proofs vs Press Proofs: Which One Do You Need?
Three proofing methods cover nearly every sign job, and each one carries a different level of accuracy, cost, and legal weight. A soft proof is a digital file, usually a PDF or an online proofing portal, viewed on a calibrated screen. A hard proof (also called a contract proof) is a physical, color-calibrated printout that serves as the binding color target between you and the printer. A press proof is an actual run on production equipment and substrate, the closest thing to seeing the final sign before it's final.
Soft proofs work for layout checks, low-cost signage, and jobs where color drift of a shade or two won't matter, like an internal wayfinding sign or a temporary banner. Contract proofs earn their cost on anything brand-critical: storefront channel letters, illuminated cabinet signs, or any order where your logo's exact blue has to match across a dozen locations. Press proofs make sense for large production runs, specialty substrates, or the first time you're printing a spot color that has to be dead-on before 200 units roll off the line.
The reason a contract proof carries legal weight comes down to measurement. Certified contract proofs follow ISO 12647-7 guidance, which sets a mean ΔE tolerance of 3 or lower across measured color patches, with no single patch exceeding a ΔE of 6. Once you sign off on a proof that meets that tolerance, you've effectively agreed this is the color standard the printer must hit. That agreement protects both sides.
| Proof Type | Best For | Cost/Time | Accuracy |
|---|---|---|---|
| Soft proof | Layout checks, low-risk jobs | Fastest, lowest cost | Screen-dependent, least reliable for color |
| Hard/contract proof | Brand colors, illuminated signs | Moderate cost and turnaround | High, ΔE-verified |
| Press proof | Long runs, spot colors, first production | Slowest, highest cost | Highest, matches final substrate |
Pro Tip: If your sign uses a specific brand Pantone, like a corporate red or blue that has to match across every location, insist on a contract proof before approving production. A soft proof on a laptop screen can't tell you what that ink will actually look like on painted metal or backlit acrylic.
Preflight and File Prep: What to Check Before You Request a Proof
Run a full preflight and fix every flagged issue before you request any proof, soft or hard. Skipping this step is the single most common reason sign jobs bounce back for revisions, and each round of revisions adds days to your schedule and often a fee to your invoice.
A solid preflight checklist covers:
- File saved as PDF/X for print compatibility.
- All fonts outlined or embedded, never left as live text that could reflow on another machine.
- Images placed at 300 DPI at final print size, not scaled up from a web graphic.
- Color mode set to CMYK or spot color, never RGB.
- Bleed and safe area margins built in, typically 0.125 inches minimum.
- Registration, trim, and crop marks included where the printer requires them.
- Dielines clearly marked and on a separate layer for any cut vinyl or custom-shaped piece.
- Pantone numbers specified explicitly wherever spot color is required.
When you export, embed the correct ICC profile for your printer's process. Most sign shops will tell you which profile to use, and skipping it is one of the fastest ways to get a color surprise later.
Automated preflight tools will flag missing fonts, low-resolution images, and incorrect color modes automatically. Never dismiss a resolution warning just because the image "looks fine" on screen. A 72 DPI logo that looks crisp on a monitor turns pixelated the moment it's blown up to a 4-foot channel letter.
Clean preflight work pays for itself. Preflight primers note that fixing font, resolution, and bleed errors before a proof is issued eliminates most of the back-and-forth that otherwise stretches a project timeline. Fewer proof rounds means a faster approval and a lower total cost.
How Do You Verify Colors Will Match Before Printing?
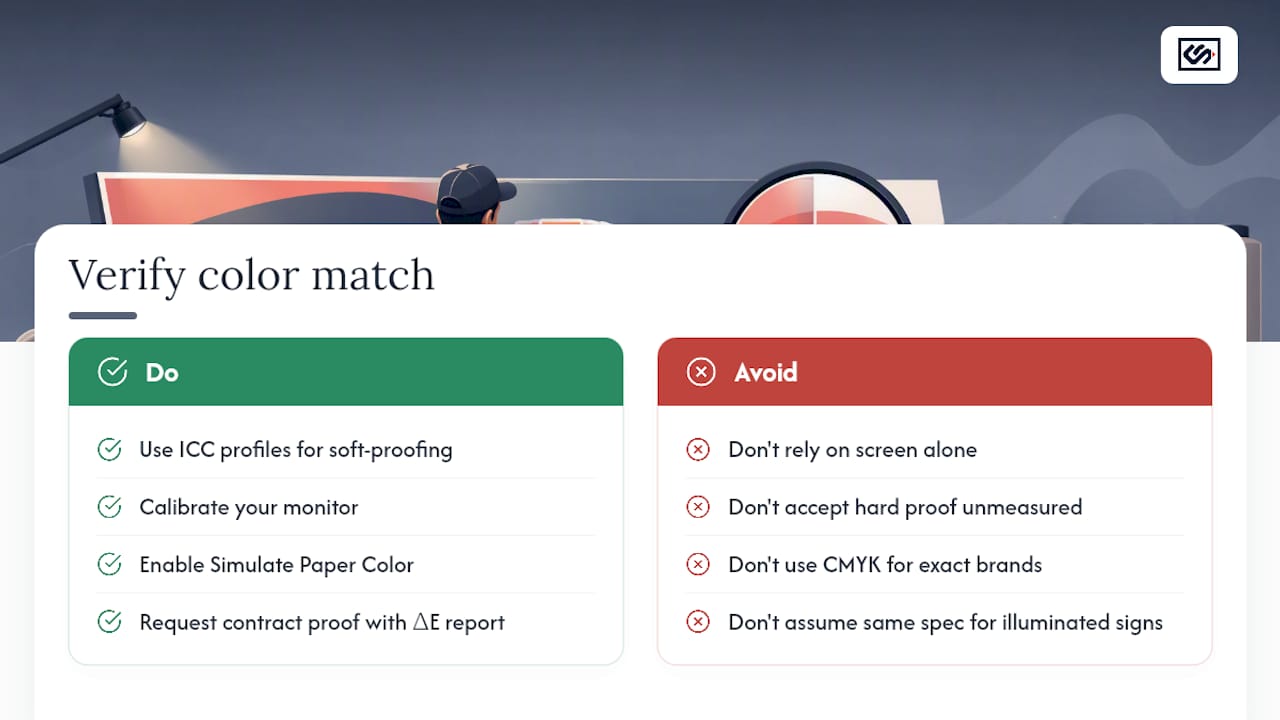
Use ICC profiles, a calibrated monitor, and a contract or press proof for anything color-critical. That combination is the only reliable way to confirm what you see on screen will match what gets fabricated.
Screens emit light. Signs, whether vinyl, acrylic, or painted metal, reflect it. That difference alone explains why a color that looks vibrant on a monitor can look flat or shifted once it's printed. Enabling "Simulate Paper Color" during a soft-proofing session helps close that gap by accounting for the white point of the actual substrate rather than the artificial brightness of your screen backlight.
For brand-specific colors, choose spot or Pantone inks over CMYK builds whenever exact matching matters. CMYK can approximate most colors, but it can't always hit a specific Pantone shade with full accuracy, especially on illuminated faces where light passing through the material changes how a color reads. An illuminated cabinet sign often needs a different color specification than the same design printed flat, because translucent substrates behave differently under interior lighting than opaque ones do in daylight.
ΔE measurements are how you confirm a contract proof actually meets the agreed standard rather than just looking close. A spectrophotometer measures the color patches on a printed proof and compares them against the target values. If your job is high-stakes enough to demand a contract proof, it's worth asking your printer for that measured proof report rather than taking their word for it.
Pro Tip: Ask your printer whether their contract proof comes with a documented ΔE report. If they can't produce one, you're paying for a "hard proof" that carries none of the accountability a real contract proof provides.
Checking Scale, Legibility, and Material Effects Before You Print
Always check actual-size scale, or a scaled mockup, at the intended viewing distance before you approve final artwork. A design that reads beautifully on a 24-inch monitor tells you almost nothing about how it will read from across a parking lot.
Material choice changes how a design performs in the real world:
- Vinyl shows color accurately but can lose contrast in direct sunlight glare.
- Acrylic with a gloss finish can reflect ambient light, washing out fine detail at certain angles.
- Painted metal absorbs more light and often reads darker than the same color on a lighter substrate.
- Translucent illuminated faces shift color and brightness dramatically between day and night viewing.
Legibility comes down to letter height relative to viewing distance. As a rough guide, plan on roughly one inch of letter height for every 10 feet of viewing distance for a pedestrian sign, and scale up considerably for anything meant to be read from a moving vehicle. Contrast matters just as much as size: light text on a light background fails even at generous letter heights.
One designer we've heard about caught a kerning problem only after printing a full-scale paper mockup and taping it to the wall. Two letters in the business name touched at production size in a way that hadn't been visible on screen. That's the value of a physical check: it catches spacing and legibility issues no monitor will reveal.
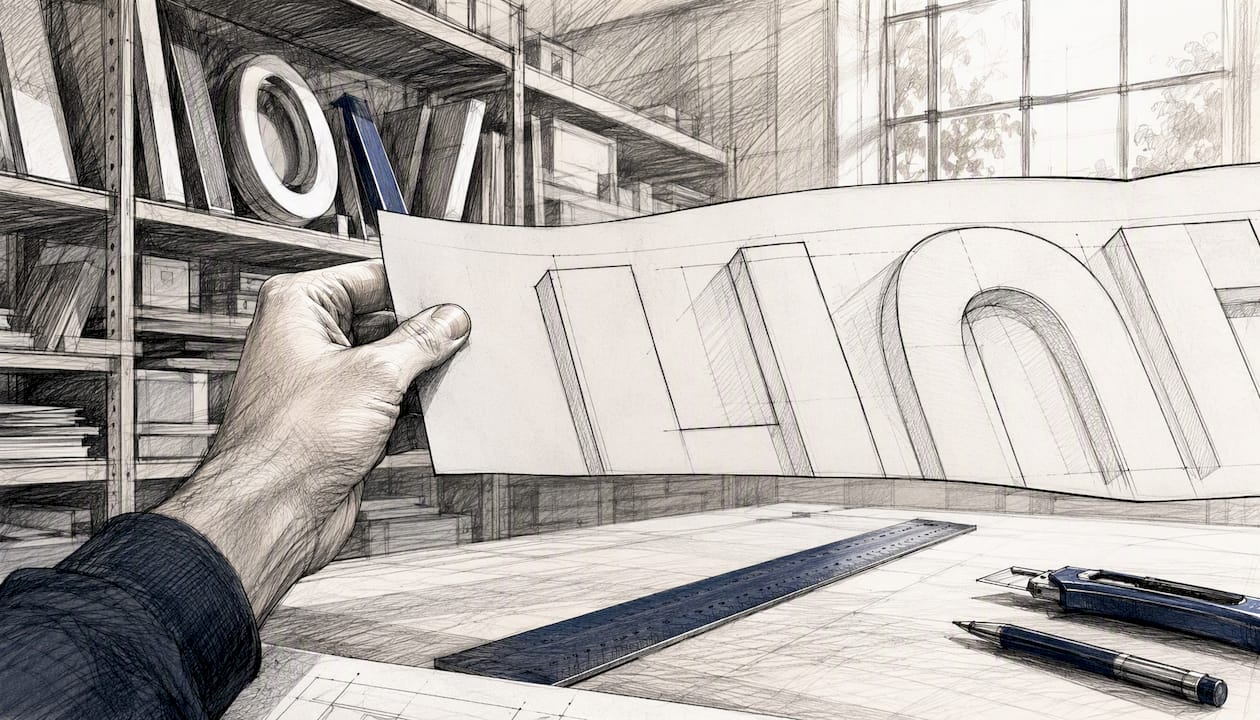
It costs a few sheets of paper and takes five minutes, and it catches more legibility problems than any amount of zooming in on a screen.*
Permit and Structural Paperwork That Commonly Delays Sign Projects
Include a complete site plan, sign schedule, elevations, and wet-stamped structural calculations with your initial submittal to avoid the delays that catch most sign owners off guard. Permitting problems, not design problems, are the number one reason sign projects fall behind schedule.
A typical municipal sign-permit package requires:
- A site plan showing property lines, building location, and where the sign will sit.
- A sign schedule listing type, dimensions, square footage, and whether it's illuminated.
- Elevation drawings showing the sign's exact placement and dimensions on the building face.
- Connection and footing details for freestanding or monument signs.
- Structural calculations wet-stamped by a licensed engineer, often referencing wind and gravity load standards such as CBC 1609 or ASCE 7-16.
- Electrical one-line diagrams and wiring details for any illuminated sign.
- Fire district approval where local code requires it.
Review timelines vary by jurisdiction, but example checklists show a common pattern: an initial review taking around 15 business days, with follow-up reviews running roughly 10 business days each. Incomplete or repeatedly revised submittals can trigger additional plan-check fees, sometimes billed at an hourly rate around $100 per hour for the extra review time.
- Name every file clearly (address, sign type, and revision number).
- Submit all required drawings in the format your jurisdiction's portal accepts.
- Double-check that structural calculations carry an actual engineer's stamp, not just a signature block.
- Confirm electrical details are included if the sign is illuminated in any way.
Build your permit submittal into your production timeline from day one. If you're waiting on structural sign-off, that's often the moment to lock in your contract or press proof, since production shouldn't start until both the design and the paperwork clear.
Building an Approval Workflow That Protects Everyone
Require a signed approval record before production starts, one that names the approver, their role, the date, and the exact file version approved. Without that record, disputes over "who approved what" become nearly impossible to resolve once a sign is already fabricated.
A clean approval workflow moves in order:
- Submit the file for preflight and fix flagged issues.
- Review the soft proof for layout, content, and general color direction.
- Request a hard/contract proof if the job is color-critical.
- Approve the contract proof once it falls within ΔE tolerance.
- Receive make-ready press sheets if a press proof applies.
- Issue final written sign-off before production begins.
Most printers offer three response options at each stage: approve as-is, approve with minor changes, or reject and revise. Minor changes after a contract proof is issued often carry a small fee and a short delay. A full rejection after production has started, on the other hand, can mean a total remake at the client's expense, which is exactly why proof approval language typically shifts financial responsibility to the client once they've signed off.
A simple sign-off template should capture:
- Approver's full name and role.
- Date and time of approval.
- File name and version number.
- Explicit acceptance language ("I approve this design as shown for production").
Pro Tip: Keep every approval record in one folder tied to the job number, not scattered across email threads. If a color dispute comes up six months later, you'll want that signed approval in thirty seconds, not thirty minutes of searching.
Cheap Physical Tests That Catch Problems Before You Commit
Paper mockups, vinyl test cuts, and backlit samples catch most last-minute surprises for a fraction of what a reprint costs. These checks take an afternoon and use materials most design studios already have on hand.
- Print a full-scale paper layout and mount it where the sign will actually hang.
- Print small color strips on the intended substrate material to check real-world hue and saturation.
- Cut a small vinyl test piece to confirm how it handles, adheres, and trims during installation.
- Hold an illuminated sample against an LED light panel to simulate how the color will look lit at night.
A basic kit for these tests costs very little: a scalpel, a roll of 3M removable adhesive for temporary mounting, a few calibrated test strips, and an inexpensive LED light panel for backlit checks. If any of these tests reveal a color or scale problem you can't resolve visually, that's your signal to escalate to a formal contract proof rather than guessing.
Pro Tip: Take a photo of the actual installation location, at the actual time of day the sign will typically be viewed, then hold your color mockup up against that photo. Ambient light and surrounding colors change how a sign reads far more than most people expect.
Final Pre-Print Checklist and How Proof Choice Affects Your Timeline
Choose your proof type based on risk tolerance, run length, and budget, then lock a firm approval deadline into your production schedule. Waiting to decide until the last minute is how rush fees happen.
Before any file goes to production, confirm:
- Preflight is fully clean with no unresolved warnings.
- Color proof is approved, either ICC-managed for lower-risk jobs or ΔE-verified for a contract proof.
- A signed approval record is on file.
- Permit and structural documents are accepted by the jurisdiction, not just submitted.
- Installation logistics are confirmed and scheduled.
| Proof Choice | Production Lead Time | Relative Cost | When It's Worth It |
|---|---|---|---|
| Soft proof only | Fastest | Lowest | Low-risk, internal, or short-run signage |
| Hard/contract proof | Adds several days | Moderate | Brand colors, illuminated signs, repeat orders |
| Press proof | Adds the most time | Highest | Spot colors, long runs, new substrates |
The extra cost of a contract or press proof is justified anytime a color mistake would be expensive to fix after the fact, think large production runs, custom Pantone matches, or a first-time substrate you haven't used before. For a one-off interior sign with no strict brand color requirement, a soft proof and a good preflight are often all you need.
How Professional Sign Shops Actually Handle Proofing
Professional shops treat the contract proof as the tipping point where financial responsibility shifts from the printer to the client. Everything before that moment is collaborative, catching errors, adjusting color, confirming scale. Everything after it is locked in.
The shops that run the smoothest workflows don't treat preflight, color QC, structural review, and approval archiving as separate steps handled by separate people. They build it into one continuous pipeline: a file comes in, it gets preflighted automatically, color gets checked against a known ICC profile, any structural elements get routed to an engineer for a wet stamp, and every approval gets logged in a searchable archive tied to the job number.
The most common client mistake is approving a soft proof for a job that clearly needed a contract proof, usually because nobody flagged the color risk early enough. A logo with a specific brand blue, viewed on an uncalibrated laptop screen in a bright office, tells you almost nothing about what that blue will look like on a backlit acrylic panel at dusk. Catching that mismatch before approval, not after fabrication, is the entire point of a structured proofing process.
[Author credential and relevant case study placeholder]
How CrispSign Handles Proofing So You Don't Have To Guess
Crispsign builds preflight checks and a managed proofing workflow directly into the ordering process, so you're not left comparing ICC profiles or chasing down a structural engineer on your own. Every design gets checked before it moves to production, and hard or press proofs can be coordinated for jobs that need that extra layer of color certainty.
This fits small and mid-size businesses ordering storefront and illuminated signage, exactly the jobs where a color mismatch or a missed permit document costs the most in time and money. Crispsign documents every approval, giving you a clear record you can point to if a permitting office or a franchise brand team asks for proof that a design was formally signed off. Instead of juggling separate vendors for design, proofing, structural review, and fabrication, you get one workflow that carries the file from first draft to finished sign. If you're ready to move a design from concept toward production, start your custom sign order and let the proofing happen as part of the process, not as a separate scramble before your deadline.
Sources
- ISO 12647-7 (2016) covers off-press proofing processes — PrePressure
- Color proofing: Ensuring accurate print colors — ColorFYI
- How to Obtain a Permit for Signs — City of San Diego Information Bulletin
- PW Commercial Monument Sign Submittal Checklist (2025) — Adams County
Every jurisdiction sets its own specific requirements, so check your local permit portal before finalizing a submittal package, since review timelines and required documents can vary meaningfully from one city to the next.
This article is general information, not a substitute for advice from a qualified lawyer. Consult a qualified legal professional about your own circumstances before acting on anything here.
FAQ
What is the difference between a soft proof and a hard proof?
A soft proof is a digital file viewed on screen, while a hard proof is a calibrated physical printout that serves as a binding color reference between you and the printer.
When should I request a press proof instead of a contract proof?
Request a press proof for long production runs, specialty substrates, or the first time you're printing a specific spot color, since it shows the design on actual production equipment rather than a proofing printer.
What ΔE tolerance should a contract proof meet?
A certified contract proof should hit a mean ΔE of 3 or lower across measured color patches, with no single patch exceeding a ΔE of 6.
What permit documents does a sign project usually need?
Most jurisdictions require a site plan, sign schedule, elevation drawings, and structural calculations wet-stamped by a licensed engineer, along with electrical details for illuminated signs.
Can Crispsign help with proofing and approvals before production?
Yes, Crispsign builds preflight checks and a managed proofing workflow into its ordering process and documents every approval for your records.