
Service Area Signage Workflow Guide for Small Businesses
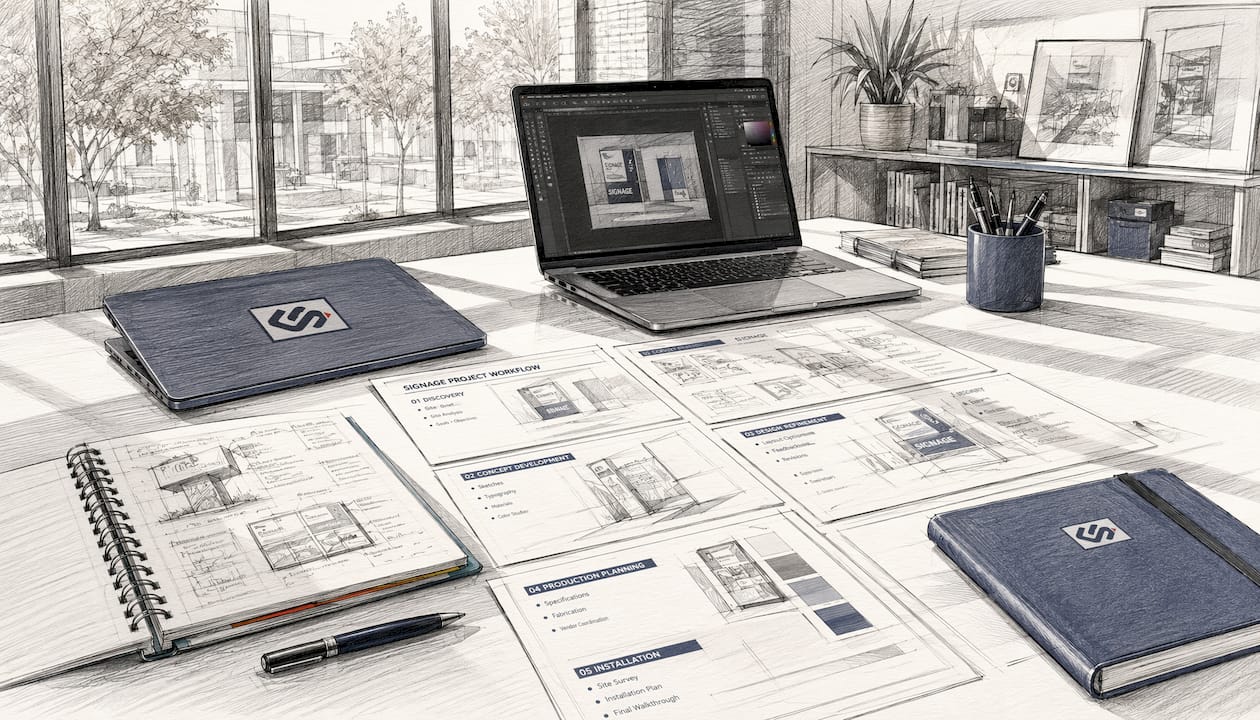
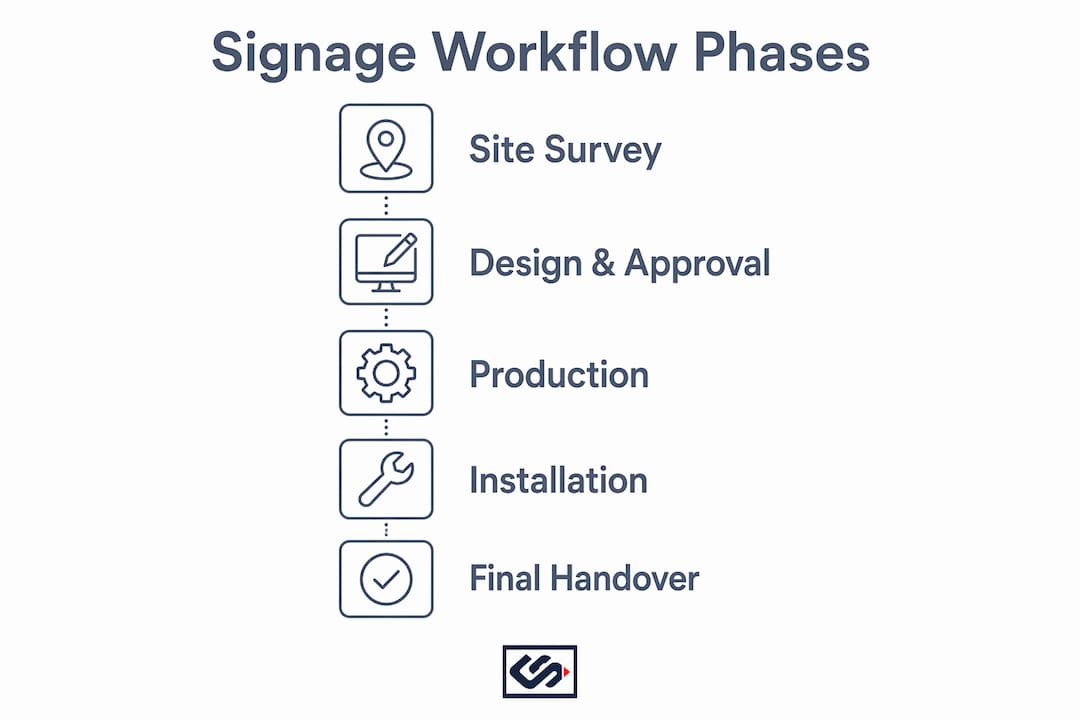
A complete service area signage workflow runs five phases: site survey and permits → design and approvals → production with quality gates → coordinated installation → final inspection and handover. Follow that sequence, document every handoff, and your sign arrives on time, on brand, and built to last.
Three documents every SMB owner should demand before releasing final payment:
- Site survey report — signed by the vendor, confirming measurements, substrate, power access, and permit triggers
- Approved proof with sign-off block — showing approver name, version number, and date before fabrication starts
- Final installation record — photos, punchlist resolution, and a signed handover form
Table of Contents
- What does a signage project workflow actually cover?
- Phase 1: What should you capture in the site survey and permits?
- Phase 2: What file specs and proofs should you require from your designer?
- Phase 3: Which production quality gates should you insist on?
- Phase 4: How do you coordinate installation day without surprises?
- Phase 5: What does a proper final inspection and handover look like?
- What are realistic lead times and cost ranges by sign type?
- How do you choose a vendor and what red flags should you watch for?
- What templates should you keep in your project folder?
- What maintenance and warranty basics should you know?
- Key Takeaways
- Why quality gates are the real difference-maker
- Crispsign handles the workflow so you don't have to
- Useful sources
- FAQ
What does a signage project workflow actually cover?
A structured signage checklist spans every phase from site survey to final handover, with a clear deliverable and a named owner at each step. Here is how responsibility flows:
| Phase | Main Deliverable | Who Owns It |
|---|---|---|
| Discovery & permits | Site survey report + permit applications | Vendor + business owner |
| Design & approvals | Approved artwork proof | Designer + business owner sign-off |
| Production | QC gate log with photos | Fabricator |
| Installation | Install record + photos | Installer |
| Final inspection & handover | Signed handover package | Business owner + installer |
Approvals travel as email plus a signed PDF or digital signature. Never let a phase begin without written confirmation from the previous one.
Phase 1: What should you capture in the site survey and permits?
Always do a physical site survey before approving fabrication. Measurements taken from photos or Google Maps miss substrate conditions, power routing, and obstructions that derail installation day.
Site survey checklist — capture every item:
- Measured elevations and sign-face dimensions
- Substrate type (masonry, metal stud, EIFS, wood)
- Power access location and distance from sign
- Sightlines and viewing distance from the street
- Overhead obstructions (awnings, trees, utility lines)
- Tenant or landlord approval status
- Permit triggers (sign type, illumination, square footage)
Most commercial signage projects require zoning review and a building permit; illuminated signs commonly need a separate electrical permit as well. Permit review timelines vary by municipality, so build a two-to-four-week buffer into your project schedule before fabrication is scheduled to begin.
Pro Tip: Get landlord authorization in writing before submitting any permit application. A signed letter on the property owner's letterhead prevents last-minute denials and is often required by the permitting office anyway.

Phase 2: What file specs and proofs should you require from your designer?
Supply print-ready files and require at least two proof rounds — a layout proof and a pre-production proof — before fabrication starts. Skipping a round is the single fastest way to end up with a sign that looks nothing like your brand.
File-spec checklist to confirm with your vendor:
- Vector files (AI, EPS, or PDF) for all logos and lettering
- Raster images at 300 DPI minimum at final output size
- Color profile: CMYK for print; confirm vendor-preferred profile (many shops use a specific SWOP or GRACoL standard)
- All fonts outlined or embedded
- Cut paths and mounting templates included
Your brand identity files should match across your storefront sign and your digital presence — inconsistent logos between your sign and your website erode recognition fast.
Approval sign-off block to require on every proof:
Approver name: __________ | Date: __________ | Version: __________ | Status: Approved / Approved with changes / Rejected
Never sign off on a proof without confirming material callouts, mounting details, and scale accuracy are shown.
Phase 3: Which production quality gates should you insist on?
Require named quality gates with documented sign-offs at three stages: pre-production, in-process, and pre-shipping. Production control points should include photos, material batch IDs, and a sign-off field at each stage to reduce rework and protect warranty coverage.
Quality gate checklist:
- Pre-production gate: Confirm approved proof matches fabrication order; verify material batch numbers; sign off before cutting begins
- In-process gate: Check dimensions against spec sheet; photograph assembly at 50% completion; note any deviations
- Pre-shipping gate: Final dimension check; cosmetic inspection (no scratches, dents, or color variance); electrical test for illuminated signs; photo of completed unit
Sample QC log entry format:
Date: ____ | Operator: ____ | Gate: Pre-shipping | Status: Pass | Corrective action: None
Pro Tip: Ask your vendor to email you the pre-shipping photo before the sign leaves the shop. It takes them two minutes and gives you proof the unit matched the approved spec before transit.
Documented gates reduce the chance of a brand-inconsistent sign reaching your storefront, and they give you clear leverage if a warranty claim becomes necessary later.
Phase 4: How do you coordinate installation day without surprises?
Confirm install-day logistics at least 72 hours in advance and keep the decision-maker on-site or reachable to approve final placement. A single-facade channel-letter installation typically takes several hours for a small crew; complex or multi-sign projects can require multiple days.
Site-prep items to arrange before the crew arrives:
- Clear parking and loader access at the sign location
- Notify tenants and building management of the installation window
- Confirm any required lane or sidewalk closure permits are in hand
- Identify after-hours preferences if daytime access is restricted
Installation execution checklist to require from the installer:
- Pre-install briefing confirming scope and placement
- Layout verification against the approved drawing before drilling
- Mounting method documented (anchor type, torque spec)
- Electrical test and photo for illuminated signs
- Site cleanup completed before crew departs
- Before-and-after photos, close-ups of fastenings and wiring
Those photos support your permit closeout, warranty registration, and any future service call.
Phase 5: What does a proper final inspection and handover look like?
Require a formal final inspection and a signed handover document before releasing final payment. A complete signage workflow includes post-install documentation as a non-negotiable step, not an afterthought.
Punchlist template — capture every item:
- Visible cosmetic fixes (scratches, gaps, misalignment)
- Electrical function test (all modules illuminated, no flicker)
- Sealant integrity around penetrations and mounting points
- Legibility check from the intended viewing distance
- Permit closeout confirmation from the municipality
Final sign-off block:
Business owner: __________ | Installer: __________ | Date: __________ | Scope accepted: Yes / Pending punchlist items
Store the signed handover package, QC log, and all photos in a single project folder. You will need them for warranty claims and future maintenance.
What are realistic lead times and cost ranges by sign type?
Simple vinyl and window graphics can be ready in days; illuminated channel letters and cabinet signs commonly take several weeks from approved proof to installation. Permit review typically adds a few weeks on top of fabrication time in most U.S. municipalities.
| Sign Type | Typical Lead Time | Primary Cost Drivers |
|---|---|---|
| Window / wall vinyl graphics | A few business days | Size, complexity of cut paths |
| Exterior flat panel | Several business days | Material, substrate prep |
| Illuminated cabinet sign | Several weeks | Electrical work, permits |
| Channel letters (exterior) | Several weeks | Fabrication complexity, permits, lift equipment |
| Carved cedar / wood sign | Several weeks | Carving depth, finish, size |
Multi-location rollouts need an additional buffer of one to two weeks per location for permit staggering and installer scheduling. Build that time into your opening or promotion date, not around it.
How do you choose a vendor and what red flags should you watch for?
Choose vendors that supply proof-of-work, documented QC gates, insurance, permit support, and a clear installation scope. Asking vendors how they track shop throughput and estimate-to-install cycles reveals whether they treat your project as a one-off task or a managed service relationship.
Vendor questions checklist:
- Can you share a sample QC log from a recent project?
- Who files permits, and is that included in your quote?
- What are your installer credentials and insurance limits?
- What does your warranty cover, and for how long?
- Do you offer maintenance plans after installation?
Red flags to watch for:
- Vague timelines with no milestone dates
- No documented approval process or proof rounds
- Unwillingness to photograph QC steps
- Unclear or verbal-only warranty terms
- Request for full payment before final handover
What templates should you keep in your project folder?
Use three short templates for every project: a pre-flight file review form, a QC gate log, and an installation checklist. These do not need to be elaborate — a one-page PDF for each is enough to create accountability and speed up warranty claims.
What each template should contain:
- Pre-flight file review: File format, resolution, color profile, fonts outlined, cut paths confirmed, version number
- QC gate log: Gate name, date, operator, pass/fail status, photo reference, corrective action
- Install checklist: Pre-install briefing, layout verification, mounting method, electrical test, cleanup, photos taken
For multi-location projects, add a location ID field to each template so records stay organized across sites. Store all signed copies in a shared cloud folder your team and vendor can both access.
What maintenance and warranty basics should you know?
Maintenance frequency depends on material. Vinyl graphics need regular cleaning with mild soap; LEDs need periodic module checks; carved wood needs resealing every one to two years depending on climate exposure.
| Material | Expected Lifespan | Suggested Maintenance Cadence |
|---|---|---|
| Cast vinyl graphics | 5–7 years | Clean quarterly; inspect annually |
| LED modules | a very long lifespan | Check connections annually |
| Aluminum cabinet | several years | Inspect sealants and paint annually |
| Carved cedar sign | 7–12 years | Reseal every 1–2 years |
Ongoing maintenance and warranty registration are part of a complete project workflow, not optional extras. To file a warranty claim without losing coverage, have these ready:
- Photo evidence of the defect
- Original installation record and photos
- Purchase or order number
- Warranty registration confirmation
Key Takeaways
A service area signage workflow succeeds when every phase has a named owner, a documented deliverable, and a signed quality gate before the next phase begins.
| Point | Details |
|---|---|
| Five-phase workflow | Run discovery, design, production, installation, and handover in sequence with signed handoffs at each stage. |
| Three must-have documents | Demand a site survey report, approved proof with sign-off block, and final installation record on every project. |
| Production quality gates | Require pre-production, in-process, and pre-shipping gates with photos and material batch IDs to reduce rework. |
| Lead time planning | Allow several weeks for channel letters plus additional time for permits; vinyl graphics can often be ready within a few business days. |
| Crispsign workflow | Crispsign implements this five-phase workflow with documented QC gates, optional installation coordination, and nationwide shipping. |
Why quality gates are the real difference-maker
Most signage problems I see come down to one skipped step: the pre-production gate. A business owner approves a digital proof, the shop starts cutting, and nobody checks whether the fabrication order actually matches the approved file. By the time the sign arrives on-site, a color is off, a dimension is wrong, or the mounting pattern doesn't match the substrate. The fix costs more than the gate would have.
The conventional wisdom is that signage delays come from permitting or shipping. That is partly true. But the deeper cause is usually a documentation gap at the design-to-production handoff. When a vendor can show you a QC log with photos at every gate, that is the clearest signal you have found a shop that treats your brand as seriously as you do. A verbal "we double-check everything" is not a quality gate. A dated photo with a sign-off field is.
Crispsign handles the workflow so you don't have to
Getting a custom sign fabricated and installed correctly is a project with real moving parts. Crispsign builds every order through the same five-phase workflow described in this guide: site-informed design, documented proof approvals, in-process QC with photo records, and optional professional installation coordination for an added flat fee passed directly to a vetted installer.
Whether you need exterior channel letters, lobby panels, or vinyl graphics, every Crispsign order ships nationwide with production specs confirmed before a single piece is cut. Get your instant estimate at crispsign.com and put your storefront to work.
Useful sources
- Commercial Sign Installation Guide — AP Installations: Covers permit triggers by sign type, site survey requirements, and typical installation crew timelines.
- Signage Deployment Checklist — Channelplay: Phase-by-phase checklist from site survey to final handover, with emphasis on documentation at each stage.
- Sign Production Workflow: Design to Delivery — Sign Customiser: File requirements, pre-flight checks, and in-process QC gate examples for production teams.
- Complete Signage Project Workflow — Spirtualglow: Covers post-install maintenance plans, warranty registration, and long-term documentation practices.
- Signage Installation Inspection Checklist — Quollnet: Interactive pre-installation, installation-process, and post-installation review checklist with digital sign-off and export features.
FAQ
What are the five phases of a signage project workflow?
The five phases are site survey and permits, design and approvals, production with quality gates, installation, and final inspection and handover. Each phase requires a signed deliverable before the next begins.
How long does a typical storefront sign take from order to installation?
Simple vinyl graphics are typically ready in 3–7 business days; illuminated channel letters commonly take 4–6 weeks in fabrication, plus a 2–4 week permit review buffer in most U.S. municipalities.
What files should I send my sign vendor?
Send vector files (AI, EPS, or PDF) for all logos and lettering, raster images at 300 DPI minimum at final output size, all fonts outlined, and cut paths or mounting templates included.
What should a final handover document include?
A signed handover document should capture the business owner's name, installer's name, date, scope accepted, punchlist resolution status, and references to the photo record and warranty registration confirmation.
Does Crispsign handle permits and installation coordination?
Crispsign offers optional installation coordination for an added flat fee, passed directly to a vetted third-party installer. Permit filing requirements vary by municipality; Crispsign's team can advise on what your project will likely need during the quoting process.