
How the Cut Vinyl Sign Process Works for Your Business
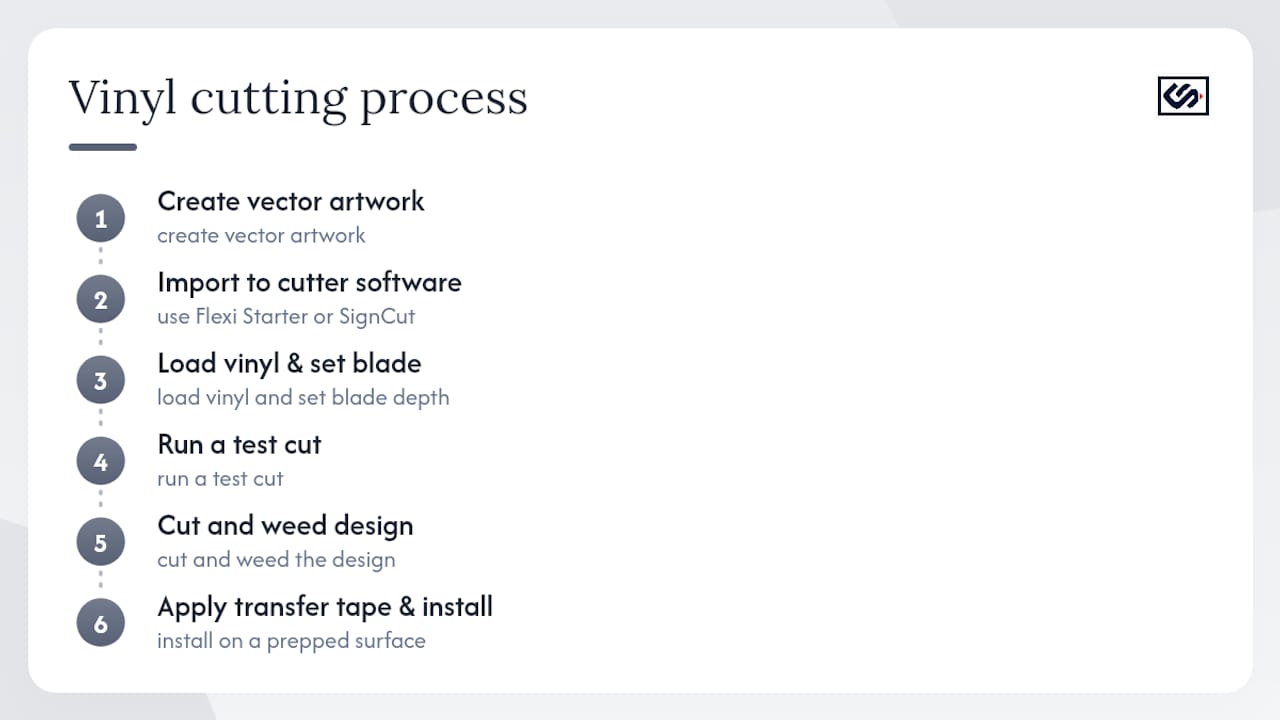
The cut vinyl sign process is a production workflow that uses a computer-controlled plotter cutter to slice shapes and lettering from solid-color adhesive vinyl, producing single-color graphics with no printed background. According to Jukebox Print, the excess material is weeded away, leaving a clean, precise graphic ready to transfer to any surface. The six-step path from idea to installed sign looks like this:
- Create vector artwork (Adobe Illustrator, Inkscape, or similar)
- Import the file into cutter software (Flexi Starter or SignCut)
- Load vinyl, select blade, and dial in pressure
- Run a test cut and confirm blade depth
- Cut, trim, and weed the design
- Apply transfer tape, prep the surface, and install
That sequence covers the full cut vinyl signage method from a blank roll to a finished sign. Whether you plan to DIY or hand the job to a shop like Crispsign, knowing each step helps you ask the right questions and catch problems early.
Key Takeaways
The cut vinyl sign process produces durable, single-color graphics by cutting vector artwork from adhesive vinyl film, and every successful result depends on correct blade setup, clean surface prep, and the right vinyl grade for the application.
| Point | Details |
|---|---|
| Test cut before every job | Run a small test shape, confirm the liner scores but does not cut through, and record the settings. |
| Cast vs. calendared vinyl | Cast vinyl lasts 7–10 years outdoors; calendared vinyl suits flat, sheltered, or short-term installs. |
| Surface prep is non-negotiable | Clean with isopropyl alcohol before applying; skip this step and edge lift is likely. |
| Temperature matters | Apply above 59°F (15°C); wet-applied graphics need approximately 48 hours to reach full bond strength. |
| DIY vs. hire a pro | Simple flat graphics are DIY-friendly; complex multi-color work or large installs benefit from a professional shop. |
Table of Contents
- How does cut vinyl differ from printed vinyl?
- What materials and tools do you need for cut vinyl signs?
- How do you prepare artwork for a vinyl cutter?
- How do you set up the machine and run a test cut?
- How do you cut, trim, and weed the vinyl?
- How do you apply cut vinyl to a surface?
- How long do cut vinyl signs last, and how do you maintain them?
- What causes common vinyl sign problems, and how do you fix them?
- What does a professional shop checklist look like for cut vinyl?
- The step most people skip is the one that matters most
- Sources
- FAQ
How does cut vinyl differ from printed vinyl?
Cut vinyl delivers a clean, painted-on look because the film itself is the color. There is no ink layer, no background carrier, and no risk of the printed image fading at a different rate than the adhesive. Printed vinyl, by contrast, runs a full-color image through a wide-format inkjet printer before laminating, which makes it the right call for photos, gradients, and multi-color brand marks.
When cut vinyl is the better choice:
- Single-color or two-color text and logos
- Storefront window lettering and door graphics
- Vehicle lettering and simple fleet decals
- Long-term outdoor applications where UV resistance matters most
When printed vinyl makes more sense:
- Photographic images or gradients
- Full-coverage vehicle wraps with complex artwork
- Multi-color brand marks that cannot be layered as separate cut pieces
Pro Tip: Cast vinyl cut graphics typically outlast calendared printed graphics in direct sun because the film itself carries the color. If your sign will face south or west on a storefront, cut vinyl in a premium cast film is worth the modest price difference.
What materials and tools do you need for cut vinyl signs?
Getting the materials right is where most DIY projects either succeed or stall. The vinyl type alone determines how long your sign lasts and how cleanly it cuts.
Vinyl types:
- Cast vinyl: Made by casting liquid PVC onto a release liner. Thinner, more conformable, and rated for 7–10 years outdoors. Use it for vehicle graphics, curved surfaces, and any permanent outdoor installation.
- Calendared vinyl: Rolled through heated calendars, thicker, and typically rated for 3–5 years outdoors. Good for flat surfaces, short-term promotions, and indoor graphics.
Consumables and accessories:
- Application/transfer tape (paper or clear film)
- Release liner
- Isopropyl alcohol (70% or higher) for surface prep
- Application fluid or soapy water for wet installs
- Squeegee with felt sleeve
- Weeding tools (hook pick, fine-point stylus)
Equipment:
- Vinyl plotter cutter (desktop or wide-format)
- 45° blade for general cuts; 60° blade for thicker vinyl or sharp internal corners
- Computer running vector software: Adobe Illustrator, Inkscape (free), Flexi Starter, or SignCut
- Cutting mat or roller trimmer for clean panel edges
What a professional shop should provide: Grade-appropriate cast or calendared vinyl matched to the application, freshly calibrated blades, a documented test-cut routine for every new material batch, and transfer tape suited to the surface texture. If a shop cannot tell you which vinyl grade they use, that is a red flag.
How do you prepare artwork for a vinyl cutter?
Vinyl cutters follow vector paths, not pixel grids. That single fact drives every file-prep decision you make.
File format rules:
- Save or export as SVG, EPS, or PDF with all paths outlined
- Convert every font to outlines before sending to the cutter; a missing font silently substitutes a different letterform
- Avoid strokes thinner than 0.5 pt at final cut size; fine strokes disappear or tear during weeding
- Remove overlapping paths and merge compound shapes to prevent double-cutting
Software-specific notes:
- Adobe Illustrator: Use Object > Expand Appearance, then Pathfinder > Unite to clean compound shapes before export.
- Inkscape: Use Path > Object to Path for text, then Path > Union to merge overlaps. Export as plain SVG.
- Flexi Starter: Accepts AI and EPS natively; use the built-in node editor to simplify complex paths before sending to the cutter queue.
- SignCut: Import SVG or DXF; use the contour-detection tool to confirm path count before cutting.
Layout and mirroring:
Nest repeat copies in rows to minimize vinyl waste. For inside-glass installs viewed from outside, mirror the entire artwork horizontally before cutting. For standard exterior surface application, no mirroring is needed.
Pro Tip: Before sending any file to the cutter, zoom to 100% and trace every path manually. A node that looks clean at 25% zoom can create a jagged corner or an open path that causes the blade to skip.
How do you set up the machine and run a test cut?
Machine setup is where most first-time cuts go wrong. Blade depth and pressure interact with backing-liner thickness, and that thickness varies between vinyl brands and even between batches of the same product.
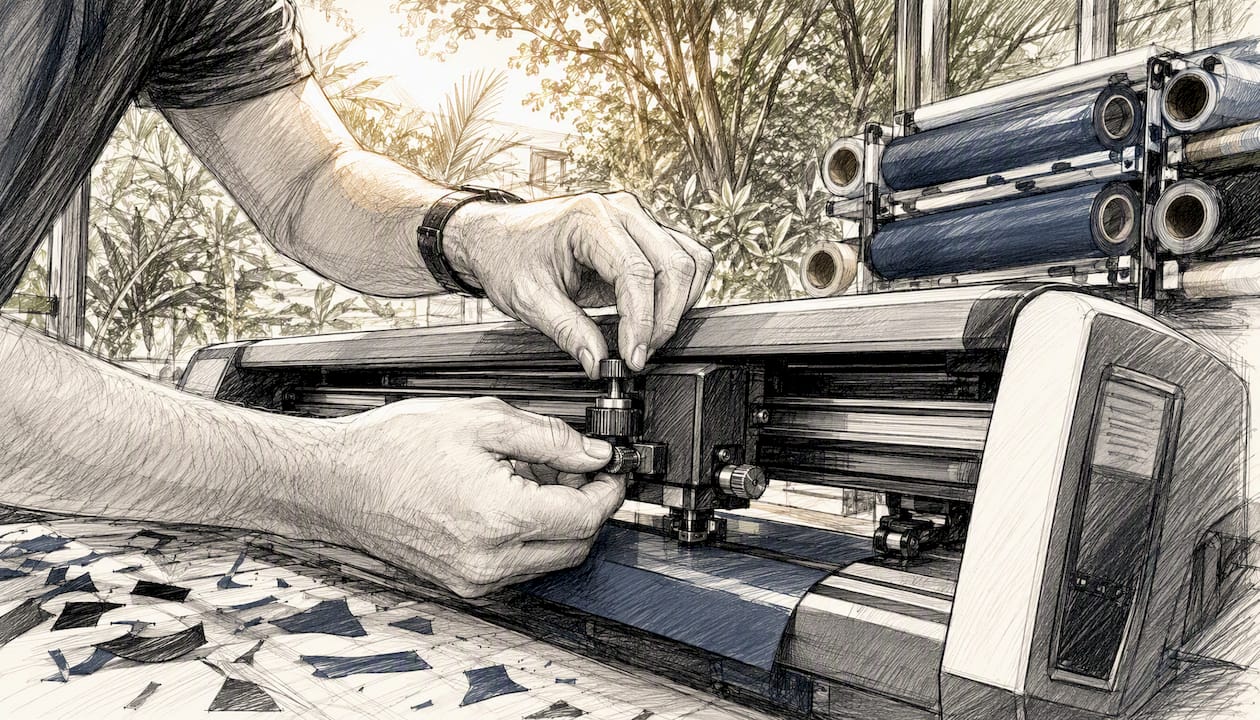
Grafityp's cutting film manual recommends letting new vinyl acclimate for at least 12 hours at room temperature before cutting, and notes that cast film generally needs less knife pressure than calendared film. Always run a fresh test cut after any blade or film change.
Blade selection:
- 45° blade: standard general-purpose choice for most calendared and cast films
- 60° blade: better for thicker vinyl, sharper inside corners, and fine detail work
Per Signwarehouse, skipping regular blade changes leads directly to jagged edges and split backing, the two most common causes of wasted material.
Test-cut routine (run this before every production job):
- Load the vinyl and set pinch rollers just inside the roll edges.
- Set blade depth so the tip barely extends past the carrier liner (roughly the thickness of a credit card).
- Send a small test shape: a 1-inch square with a circle inside works well.
- Peel the test shape. The vinyl should lift cleanly; the liner should show a faint score line but not cut through.
- If the vinyl tears or the liner cuts through, reduce pressure by 5–10 grams and retest.
- If the vinyl does not release cleanly, increase pressure by 5 grams and retest.
- Record the confirmed blade angle, pressure, and speed for that vinyl batch.
Pro Tip: Run a new test cut every time you load a fresh roll, even from the same brand. Backing-liner thickness varies between rolls, and a setting that worked yesterday can split the liner today.
How do you cut, trim, and weed the vinyl?
Once the test cut passes, the production cut runs the same way — but at full size. Most cutters perform a "kiss cut," meaning the blade cuts through the vinyl face film without cutting the backing liner. That clean separation is what makes weeding possible.
After the cut finishes, advance the material past the cutter head and trim the panel with a roller trimmer or scissors, leaving a half-inch border around the design.
Weeding technique:
- Work in a temperature range of 59°F–73°F (15°C–23°C); cold vinyl is brittle and tears, warm vinyl stretches.
- Start by removing the large background sections first, then work inward toward fine detail.
- Use a hook pick or weeding pen to lift small internal counters (the centers of letters like "O," "A," and "B").
- Pull waste film at a low, consistent angle rather than straight up to avoid lifting the design.
Weed box tip: Draw a rectangle around the design before cutting. That border line creates a clean frame to peel against, making it much easier to remove background material without disturbing the graphic.
Before moving to transfer tape, confirm:
- All background vinyl is removed
- No design pieces have lifted from the liner
- Internal counters are clean and intact
- No stray adhesive residue remains on the liner surface
Pro Tip: For very detailed designs, hold the weeded panel up to a light source. Missing counters and lifted edges show up immediately under backlighting — a 30-second check that prevents a ruined install.
How do you apply cut vinyl to a surface?
Surface prep is not optional. Roland DG's vinyl lettering guide confirms that cleaning with isopropyl alcohol removes invisible oils and that applying in temperatures above 59°F (15°C) is critical for proper adhesion. Failure to clean is a leading cause of premature edge lift.
Step-by-step installation:
- Wipe the surface with isopropyl alcohol and let it dry completely (30–60 seconds).
- Cut a piece of transfer tape slightly larger than the design and apply it over the weeded vinyl, squeegee from center outward.
- Position the vinyl on the surface. For large panels, use masking tape as a hinge along the top edge.
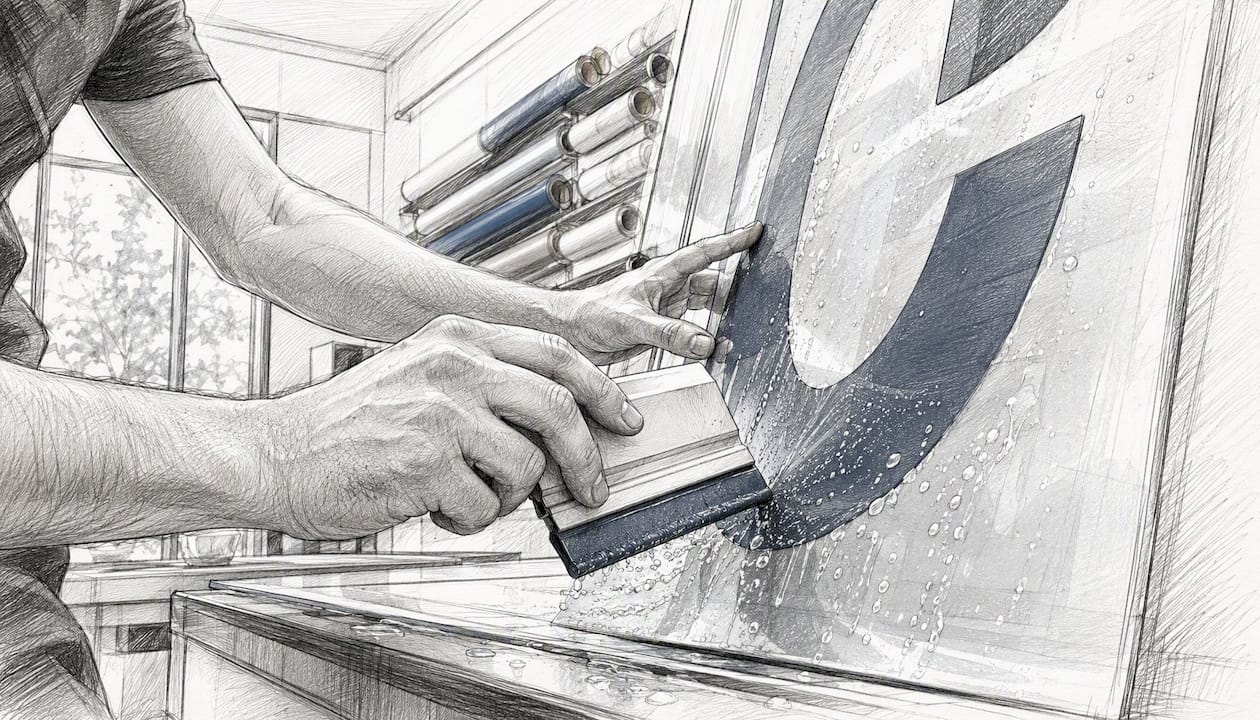
- Squeegee from the center outward in overlapping strokes, applying firm, even pressure.
- Remove the transfer tape at a low angle (roughly 30°), pulling back over itself rather than straight up.
- Squeegee the vinyl one final time after tape removal to seat any lifted edges.
Dry vs. wet application:
Dry application gives immediate tack and works well for small graphics and flat surfaces. Wet application — a light spray of application fluid or diluted dish soap — lets you reposition large graphics before the adhesive sets. For large window graphics, wet application is the professional standard because it prevents trapped bubbles. Per the Grafityp cutting film manual, full adhesive strength after a wet install can take approximately 48 hours to develop under recommended conditions.
Pro Tip: Never apply vinyl to a surface below 50°F (10°C). Cold adhesive does not bond properly, and the sign may peel within days regardless of how clean the surface was.
How long do cut vinyl signs last, and how do you maintain them?
Lifespan depends on three variables: vinyl grade, installation quality, and sun exposure. High-quality cast vinyl installed correctly on a clean surface can last 7–10 years outdoors. Calendared vinyl on a flat, sheltered surface typically performs well for 3–5 years.
Maintenance checklist:
- Clean with mild soap and water or a diluted isopropyl alcohol solution; avoid abrasive pads or solvents.
- Inspect edges annually for lifting; press down any loose corners with a squeegee and mild heat from a heat gun.
- Avoid pressure washing directly at sign edges, which forces water under the adhesive.
- For vehicle graphics, hand-wash only; automated car washes with brushes accelerate edge wear.
UV exposure is the primary aging factor for outdoor vinyl. Cast films resist UV degradation significantly better than calendared films, which is why Crispsign uses cast-grade vinyl for all exterior storefront graphics and vehicle decals.
Temperature and adhesion note: Applying vinyl in temperatures above 59°F (15°C) and allowing wet-applied graphics to cure for 48 hours before washing or heavy exposure gives the adhesive time to reach full bond strength.
What causes common vinyl sign problems, and how do you fix them?
Most failures trace back to one of four root causes: wrong blade setting, dirty surface, wrong temperature, or a file with open paths.
Quick-fix guide:
- Bubbles after dry application: Prick the bubble with a fine pin at a 45° angle, then squeegee flat. For large bubbles, use a heat gun on low to soften the adhesive before squeegeeing.
- Poor adhesion or edge lift: Re-clean the surface with isopropyl alcohol, apply heat with a heat gun, and press the edge firmly. For difficult substrates like powder-coated metal, an adhesion promoter applied before the vinyl helps.
- Vinyl tears during weeding: The room is too cold, the blade is dull, or pressure is too high. Warm the vinyl slightly with a heat gun, replace the blade, and re-run the test cut.
- Jagged cut edges: Blade is dull or speed is too high for the detail level. Reduce speed by 20%, replace the blade, and retest.
- Split backing liner: Blade depth is too deep or pressure is too high. Back off pressure in 5-gram increments until the liner scores but does not cut through.
Before calling a job complete, confirm:
- No bubbles or lifted edges visible
- All transfer tape removed
- Edges are fully adhered around the perimeter
- Design is centered and level per the original layout
What does a professional shop checklist look like for cut vinyl?
A shop that skips documentation is a shop that repeats mistakes. Crispsign's production workflow treats every cut vinyl job as a traceable process, not a one-off task.
Production checklist:
- Confirm all artwork is in vector format with fonts converted to outlines
- Verify color matches the approved proof (Pantone or hex reference)
- Run a test cut on the same vinyl batch being used for production; record blade angle, pressure, and speed
- Inspect weeded panel under a light source before applying transfer tape
- Photograph the finished panel before packaging for customer approval reference
- Obtain customer sign-off on a digital proof before starting the full production run
Logistics and shipping:
- Track material batch and lot numbers for warranty and reorder purposes
- Allow wet-applied graphics to cure for 48 hours before shipping or handling
- Roll finished panels face-out on a core, never fold; folding creates permanent crease lines in the adhesive
- Include installation instructions and a squeegee in every shipped order
Pro Tip: Turnaround for a standard cut vinyl order at a professional shop typically runs 3–5 business days from approved artwork. Rush options exist, but they require a clean, ready-to-cut vector file at the time of order. Sending a JPEG and asking for a rush is the single most common cause of delays.
The step most people skip is the one that matters most
Every guide on cut vinyl covers the fun parts: picking colors, running the cutter, watching the design emerge. What they underplay is the test cut. Not as a formality, but as the single most consequential step in the entire process.
Here is what the research actually shows: blade tip height and pressure need recalibration every time the vinyl type or batch changes because backing-liner thickness varies. That means a setting that worked perfectly on Monday can split the liner on Tuesday with a new roll from the same brand. Shops that document their test-cut settings for each batch eliminate this problem almost entirely. Shops that skip documentation repeat the same material waste job after job.
The second thing most guides get wrong is the cut-vs-print decision. The default advice is "use printed vinyl for anything complex." That is too broad. A two-color logo with clean edges cuts beautifully, lasts longer outdoors than a printed equivalent, and costs less per square foot. The painted-on look that cast cut vinyl delivers is genuinely hard to replicate with print. Reserve printed vinyl for what it actually does better: gradients, photography, and full-coverage color fills.
For small business owners, the practical takeaway is this: if your sign is text, a logo, or a simple shape in one or two colors, cut vinyl is almost always the right call. If you are ordering from a shop, ask which vinyl grade they use and whether they run a documented test cut. A shop that cannot answer both questions is guessing with your sign.
Sources
- What is the difference between vinyl cut decals and vinyl printed stickers? | Jukebox Help Center
- 5 Signs You Need a New Cutter | Roland DG
- How to Cut Vinyl Using a Vinyl Cutter: 14 Steps (with Pictures)
- Manual: working with cutting films.
- Mastering the Art of Cutting Permanent Vinyl – Signwarehouse
FAQ
What does "cut vinyl" mean?
Cut vinyl refers to adhesive vinyl film that is cut into shapes or lettering by a computer-controlled plotter cutter, leaving a single-color graphic with no printed background after the excess material is weeded away.
What is the difference between cut vinyl and print vinyl?
Cut vinyl is a solid-color film cut to shape, giving a painted-on look with strong UV resistance. Printed vinyl uses inkjet printing for full-color images, gradients, and photos, but the ink layer can fade faster than the adhesive in direct sun.
What is the process of vinyl cutting?
The process runs in six steps: create vector artwork, import it into cutter software such as Flexi Starter or SignCut, load the vinyl and set blade depth, run a test cut, cut and weed the design, then apply transfer tape and install on a prepped surface.
How long do vinyl signs last?
Cast vinyl cut signs can last 7–10 years outdoors when installed correctly on a clean surface. Calendared vinyl typically performs well for 3–5 years on flat, sheltered surfaces.