Drive-Through Sign Design for Restaurants: 2026 Guide
Drive-through sign design for restaurants is the strategic use of high-brightness, weatherproof digital displays positioned and designed to boost visibility and improve ordering efficiency at drive-through lanes. Drive-through sales generate 70–80% of revenue for major quick-service restaurant chains, which means your signage is not a cosmetic detail. It is a revenue system. This guide covers hardware specifications, content hierarchy, installation best practices, and ongoing management so you can build a drive-through signage setup that performs every shift.
What are the hardware requirements for drive-through sign design?
The right display hardware is the foundation of every effective drive-through signage setup. Choosing the wrong specs means signs that wash out in sunlight, fail in winter, or require expensive retrofits within two years.
Brightness and weatherproofing
Outdoor readability starts with brightness. Minimum outdoor brightness is 2,500 nits, with 3,000+ nits recommended for direct sunlight exposure. A display running below that threshold becomes unreadable on a clear afternoon, which is exactly when your drive-through line is longest.
Weatherproofing is equally non-negotiable. IP65 rating or higher is required for outdoor drive-through signs, covering full dust protection and water resistance from any direction. Operating temperature range should span at least -30°C to 60°C to handle both winter freezes and summer heat without hardware failure.
Anti-glare coatings reduce surface reflection from direct sun and headlights at night. Fast pixel response times, typically under 8ms, prevent motion blur when your content transitions between menu items or promotional slides.
Screen size and viewing distance
Screen size must match your lane geometry. A single-lane setup with a 15-foot viewing distance can work with a 43-inch display, but a dual-lane configuration or a longer approach typically requires 55-inch or larger panels. Mount height and tilt angle affect the effective viewing window, so size selection and placement decisions belong together, not in separate conversations.
Cost tiers
Hardware costs range from $1,500 to $15,000+ per display, with full drive-through station systems reaching $15,000 to $40,000. Entry-level single-panel setups suit independent operators with one lane. Enterprise-grade multi-panel configurations with integrated order confirmation screens suit high-volume chains running multiple lanes simultaneously.
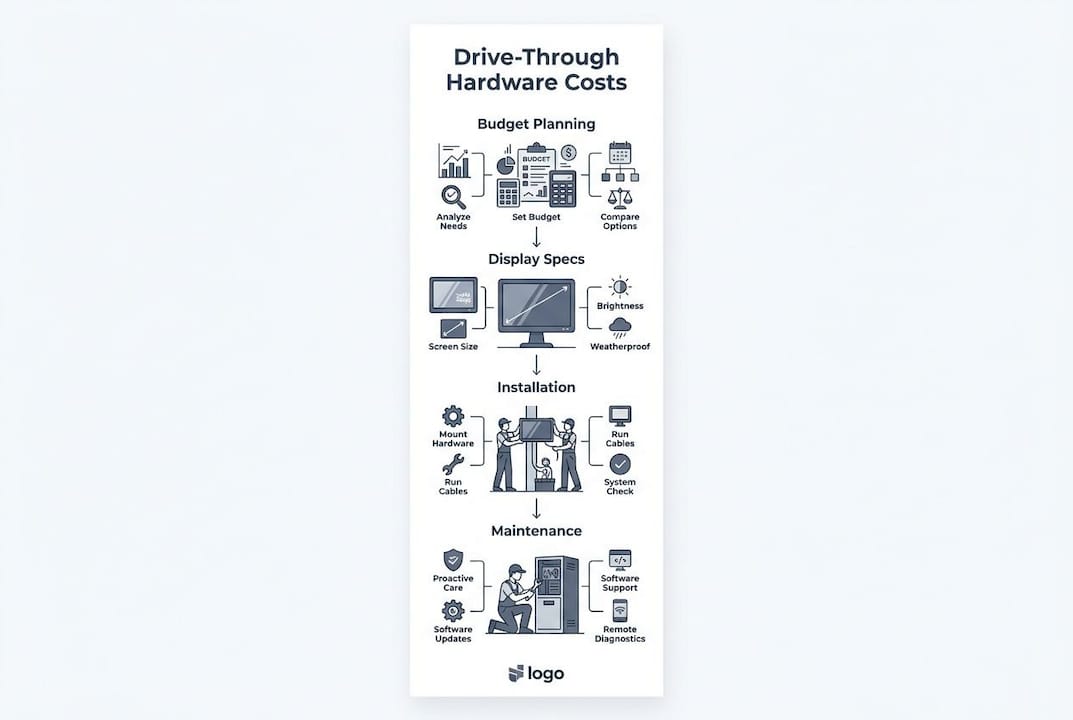
Pro Tip: Budget a separate line item for site preparation. Power wiring, data cabling, conduit, and weatherproof mounting hardware routinely add 20–40% on top of display costs. Operators who skip this step face expensive retrofits after installation.
How to design clear and compelling drive-through signage content?
Hardware gets your sign visible. Content design determines whether customers order quickly, spend more, and leave satisfied. Poor content layout creates decision paralysis, slows throughput, and costs you revenue per car.
Content hierarchy: the three-zone model
The most effective drive-through menu boards divide the screen into three functional zones:
- Hero Zone (top 30%): Reserve this space for high-margin specials, limited-time offers, and combo deals. The Hero Zone drives faster customer decisions and improves upsell potential by placing your most profitable items where eyes land first.
- Primary menu (middle 40%): Display core menu categories with clear item names, brief descriptors, and prices. Keep this zone consistent across dayparts so returning customers can navigate without re-reading everything.
- Supporting information (bottom 30%): Use this area for nutritional callouts, allergen notices, loyalty program reminders, and payment options. This content supports the sale without competing with it.
Digital menu boards increase average order value by 3–5% when promos and upsells are placed correctly. That lift compounds across hundreds of transactions per day.
Typography and color contrast
Font sizes of 1.5 inches or larger for item names are the standard for drive-through readability. Customers read your board from a moving vehicle in under five seconds. White or yellow text on dark backgrounds delivers the contrast ratio needed for fast comprehension. Avoid script fonts, thin weights, and color combinations with low contrast ratios.
Limit descriptive text per item to five words or fewer. A customer ordering a burger does not need a paragraph. They need a name, a price, and a photo.
Dayparting and dynamic content
Dayparting means scheduling different menu content by time block: breakfast from 6:00 AM to 10:30 AM, lunch from 10:30 AM to 3:00 PM, and dinner from 3:00 PM onward. A cloud-based content management system (CMS) handles these transitions automatically. You set the schedule once and the board updates without staff intervention.
Avoid overusing motion and animation. One animated element per zone is the practical ceiling. More than that, and the board reads as chaotic rather than engaging.
Pro Tip: Apply a color contrast checker to every menu board design before it goes live. A ratio of at least 4.5:1 between text and background meets accessibility standards and guarantees readability in bright outdoor conditions.
What are the best practices for installing drive-through signs?
Installation quality determines whether your hardware performs to spec or underperforms from day one. A well-specified display mounted incorrectly is still a problem.
Conduct a full site evaluation first. Site evaluation for sunlight exposure, obstructions, and power availability is the required starting point. Map where direct sunlight hits the sign at 8:00 AM, noon, and 4:00 PM. Identify any trees, canopies, or structures that create shadows or block sightlines.
Set mounting height and tilt angle for your lane geometry. The center of the display should sit at driver eye level plus 12–18 inches to account for varying vehicle heights. A forward tilt of 5–10 degrees reduces glare and improves the viewing angle from inside a vehicle.
Use weatherproof, vandal-resistant enclosures. Outdoor enclosures protect both the display and cabling from physical impact, moisture intrusion, and tampering. Stainless steel hardware and sealed conduit runs are standard for permanent installations.
Plan power and data runs before breaking ground. Site prep costs are consistently underestimated, and retrofitting power and data to existing lanes costs far more than including it in initial construction. Run conduit with spare capacity so future hardware upgrades do not require new trenching.
Verify local signage regulations and zoning compliance. Height limits, illumination restrictions, and setback requirements vary by municipality. Pull permits before installation, not after.
Integrating motion sensors or vehicle detection triggers into your drive-through sign system lets you refresh content dynamically as each car pulls up. This creates a more responsive experience and opens the door to personalized promotions based on time of day or queue length.
Wayfinding signs for multi-lane setups require the same site discipline. Clear lane direction signage prevents bottlenecks and reduces the chance of customers entering the wrong lane, which slows your entire operation.
How to manage drive-through signage for long-term performance?
A drive-through sign that runs perfectly on day one can degrade quietly over months if you have no management system in place. Proactive management protects your investment and keeps content accurate.
- Use a cloud-based CMS for all content updates. Remote CMS management allows content updates across all boards in under 30 seconds. That speed matters when a menu item sells out or a price changes mid-shift.
- Monitor hardware health with automated alerts. Set up temperature monitoring and uptime alerts so you know about a display failure before a customer does. Most enterprise-grade systems include this natively.
- Schedule quarterly cleaning and physical inspections. Dust, pollen, and road grime accumulate on display faces and reduce effective brightness. Clean panels restore output without any hardware cost.
- Plan firmware and software update cycles. Outdated firmware creates security vulnerabilities and compatibility issues with new content formats. Schedule updates during off-peak hours, typically between 2:00 AM and 5:00 AM.
- Train staff on CMS basics. Your manager on duty should be able to pull a sold-out item from the board without calling your IT vendor. Basic CMS training takes under two hours and prevents content errors during peak service.
- Use analytics to refine content. Track order accuracy rates, average ticket size, and throughput speed before and after content changes. Data tells you which promos drive orders and which ones customers ignore.
Avoid the most common maintenance mistake: leaving seasonal promotions on the board after they expire. Stale content erodes customer trust and signals that your operation is not paying attention.
Key Takeaways
Effective drive-through sign design combines the right hardware specifications, a clear three-zone content layout, and disciplined installation and management to protect and grow drive-through revenue.
| Point | Details |
|---|---|
| Hardware specs matter first | Use displays rated at 3,000+ nits and IP65 or higher for reliable outdoor performance. |
| Content hierarchy drives revenue | Place high-margin promos in the Hero Zone (top 30%) to increase average order value. |
| Site prep is a budget line item | Plan power, cabling, and mounting costs before installation to avoid costly retrofits. |
| CMS enables real-time control | Cloud-based content management updates all boards remotely in under 30 seconds. |
| Maintenance protects your investment | Quarterly cleaning, firmware updates, and staff CMS training keep signage performing long-term. |
What I've learned from watching operators get drive-through signage wrong
Most restaurant operators I talk to focus almost entirely on the display itself. They compare panel sizes and brightness specs, pick a number, and move on. The site evaluation gets five minutes of attention. That is where the problems start.
Sunlight angles change by season. A sign that reads perfectly in december can wash out completely by june when the sun sits higher and hits the panel at a different angle. I have seen operators spend $20,000 on hardware and then discover the display faces due west with no shade, making it unreadable during the dinner rush. A 30-minute site visit with a compass and a sun-angle app would have caught that.
The other pattern I see constantly is content stagnation. Operators launch with a great menu board design, then never touch it. The same promotional slide runs for eight months. Customers stop reading it. The board becomes visual noise. The fix is simple: build a content calendar into your operations the same way you build a cleaning schedule. Swap promos monthly, update daypart menus seasonally, and connect your CMS to your POS data so sold-out items disappear automatically.
The operators who get the most from their drive-through signage treat it as a living system, not a one-time installation. That mindset shift is worth more than any hardware upgrade. If you want to see how exterior signage mistakes compound over time, the pattern in drive-through setups is the same as in storefront signs: neglect compounds quietly until it costs you customers.
— Nick
Crispsign's approach to professional drive-through signage
Restaurant owners who want signage built to perform from day one work with Crispsign. The team designs and installs custom signage fabricated to spec for your location, lane geometry, and brand standards.
Crispsign's product line covers everything from ADA-compliant restaurant signage to full exterior and drive-through sign systems. Every project goes through a production review before it ships, so what arrives on site matches what you approved. For restaurant owners who need signage that captures attention, communicates clearly, and holds up through every season, Crispsign delivers professional-grade results without the back-and-forth of traditional sign shops. Visit crispsign.com to get started.
FAQ
What is drive-thru sign design for restaurants?
Drive-thru sign design is the process of selecting, positioning, and designing outdoor digital or static displays to improve customer visibility and ordering speed at restaurant drive-through lanes. Effective design combines hardware specifications, content layout, and site placement into a single system.
What brightness do outdoor drive-through signs need?
Outdoor drive-through displays require a minimum of 2,500 nits, with 3,000+ nits recommended for direct sunlight readability. Displays below that threshold become unreadable during peak daytime hours.
How much does a drive-through digital sign system cost?
A single outdoor digital display costs between $1,500 and $15,000+, while a full drive-through station system ranges from $15,000 to $40,000. Site preparation costs for power and cabling add significantly to that total and should be budgeted separately.
What is the Hero Zone in drive-through menu board design?
The Hero Zone is the top 30% of a digital menu board screen, reserved for high-margin specials and limited-time offers. Placing your most profitable items in this zone drives faster customer decisions and increases average order value.
How often should drive-through signage content be updated?
Promotional content should rotate at least monthly, and daypart menus should update automatically through a cloud-based CMS. Stale content reduces customer engagement and signals poor operational attention to detail.