What Is Minimum Viable Signage for Small Businesses?
Minimum viable signage is the simplest, real-world sign solution that lets you test customer response before spending money on permanent fixtures. Borrowed from the minimum viable product concept in software development, it applies the same logic to storefronts: build the least you need to learn the most. Prototyping signs costs as little as $0.20–$0.40 per sign for in-house printing, compared to traditional fabrication with $200 minimum orders and long lead times. For small and medium-sized business owners, that gap is the difference between a smart test and an expensive guess.
What is minimum viable signage and why does it matter?
Minimum viable signage, often called MVS, is defined as the most basic version of a sign that still communicates your core message and draws a measurable customer response. The term adapts the minimum viable product framework from tech startups and applies it directly to physical retail and storefront branding. The goal is not to look polished. The goal is to learn fast and spend little while doing it.
MVS works because failing to prototype signs leads to costly permanent signage that may not drive the traffic or conversions you expected. A printed paper sign taped to a window costs almost nothing. A fabricated channel letter sign installed above your entrance can run into the thousands. Testing your message with the cheap version before committing to the expensive one is not a compromise. It is a sound business decision.
MVS is especially relevant for startups, pop-up shops, and any business entering a new location or launching a new product line. You get real-world data on what works before you lock in a design, a message, or a placement.
What makes signage viable? Core design principles explained
Viable signage is signage that communicates clearly within the time and distance a viewer has to read it. Industry standards recommend 1 inch of capital letter height for every 25 feet of viewing distance for comfortable readability. A sign meant to be read from 100 feet away needs 4-inch tall letters at minimum.
Letter height by viewing distance:
| Viewing Distance | Minimum Letter Height |
|---|---|
| 25 feet | 1 inch |
| 50 feet | 2 inches |
| 75 feet | 3 inches |
| 100 feet | 4 inches |
| 150 feet | 6 inches |
Readability also depends on time. Signs must be readable in under 5 seconds and contain 5 words or fewer for effective shopper engagement. That constraint forces clarity. If your sign needs more than 5 words to make its point, the message is not ready yet.
High contrast, clear visual hierarchy, and negative space significantly increase legibility and impact. Dark text on a light background, or light text on a dark background, outperforms low-contrast combinations every time. Visual hierarchy means the most important word or phrase is the largest element on the sign. Everything else supports it.
Context also shapes what "viable" means. A pedestrian reading a window sign from 3 feet away has more time and proximity than a driver passing at 35 mph. Design for the actual viewing condition, not an ideal one.
Pro Tip: Before printing anything, stand at the exact distance your customers will view the sign and read your draft message aloud. If it takes more than 5 seconds, cut words.
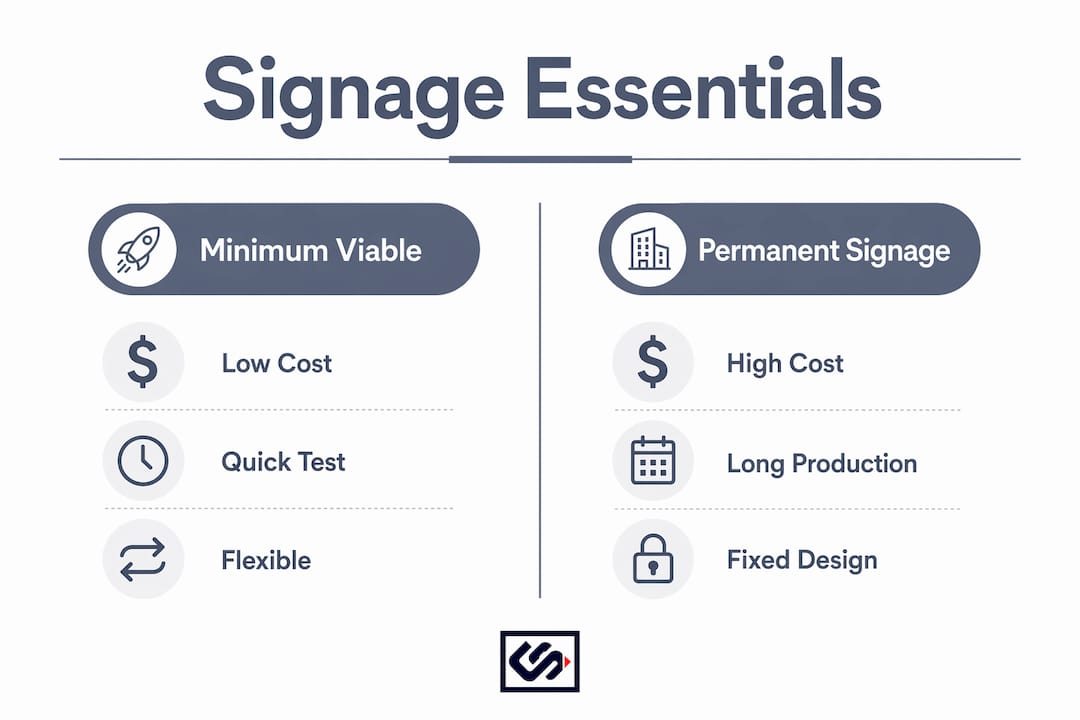
How does minimum viable signage differ from traditional permanent signage?
Traditional permanent signage involves fabricated materials, long production lead times, and significant upfront cost. Channel letters, dimensional logos, and monument signs are built to last years. They look authoritative. They also lock you into a message, a placement, and a design before you have tested any of them.
MVS uses what practitioners call "realistic fakes." Printed mockups and taped layouts validate customer reaction before any permanent investment is made. A taped outline on a wall shows you exactly how a sign will feel in a space. A printed paper version hung at eye level tells you whether the message lands.
MVS vs. traditional signage at a glance:
| Factor | Minimum Viable Signage | Traditional Permanent Signage |
|---|---|---|
| Cost | $0.20–$0.40 per prototype | $200+ minimum orders |
| Lead time | Hours to days | Weeks to months |
| Flexibility | High, easy to change | Low, costly to modify |
| Risk | Minimal | Significant |
| Durability | Short-term | Long-term |
The flexibility advantage extends beyond cost. MVS lets you test multiple messages in the same location over a short period. You can run version A for two weeks, swap to version B, and compare foot traffic or customer inquiries. That kind of iteration is impossible with permanent fabricated signs.
One tactic that extends MVS thinking into permanent signage is decoupling physical frames from message content using QR codes or digital inserts. The frame stays fixed. The message updates digitally. This reduces recurring print costs and shortens production delays when your promotions or offerings change.
Pro Tip: Photograph your MVS prototype in place and share it with three customers or colleagues before committing to production. Their first reaction tells you more than a week of internal debate.
What are the practical methods to create minimum viable signage?
Creating MVS does not require a print shop or a design agency. The materials are accessible, and the process is straightforward.
- Print paper signs in-house. Use a standard office printer and full-sheet label paper or cardstock. Mount them at the exact height and location you plan for the permanent sign. This costs under $1 per test and takes minutes.
- Use taped floor or wall markings. Painter's tape outlines the footprint of a sign, a directional arrow, or a display area. Printed prototypes and taped floor markings effectively simulate signage presence for customer testing without heavy costs.
- Apply simple vinyl decals. Cut vinyl is inexpensive and repositionable. It works on glass, walls, and doors. It looks more finished than paper and holds up for weeks of testing.
- Add a QR code as a flexible content holder. A printed sign with a QR code lets you update the destination URL without reprinting. Using QR codes enables easy updates and iterative improvements without reprinting the physical sign.
- Observe and gather feedback. Watch where customers look, where they stop, and where they walk past without noticing. Ask directly: "Did you see the sign near the entrance?" Observational data beats assumptions every time.
Even in prototype form, apply basic physical standards where possible. Signage materials standardized for durability, such as 0.080-inch aluminum substrates and 7-year warranty inks, prevent over-engineering or under-durability when you move to permanent production. Knowing these specs early helps you brief a fabricator without overpaying.
For wayfinding signage specifically, test the path before you build it. Walk the route your customer takes from the entrance to the register, the restroom, or the service desk. Place paper signs at every decision point and watch whether people follow them naturally.
What costs should small businesses expect for signage?
MVS prototyping sits at the low end of any signage budget. Paper-based prototypes cost $0.20–$0.40 per sign when printed in-house. Vinyl decals run a few dollars per square foot. These are not permanent solutions, but they are real tests that produce real data.
When you are ready to move to permanent signage, costs scale significantly:
- Indoor LED-backlit displays are more affordable than direct-view LED panels and popular among small businesses for lobby and retail use.
- Outdoor LED signs for small businesses start around $15,000 to $25,000 installed, depending on local regulations and size.
- Fabricated interior signs such as lobby logos, dimensional letters, and ADA-compliant plaques vary widely by material and complexity.
Regulations add cost too. Most permanent signage in the U.S. must comply with ADA standards, including tactile characters, Braille, and high-contrast finishes. Signs must be mounted 48–60 inches above the floor, and sans-serif fonts are recommended for accessibility compliance. Ignoring these requirements during the permanent phase creates rework costs that MVS testing cannot prevent.
The cost-benefit case for MVS is straightforward. Spending $5 on prototypes to validate a message before committing to a $2,000 fabricated sign is not optional for a budget-conscious business. It is the responsible sequence. Test cheap, then build right.
How can businesses implement MVS to improve storefront visibility?
Applying MVS to your storefront starts with a clear brief, not a design tool.
- Define your core message first. One action, one benefit, or one location. "Fresh coffee inside," "Enter here," or your business name. Nothing more.
- Identify the viewing context. Is your customer on foot, in a car, or inside the building? That determines letter size, placement height, and contrast requirements.
- Choose the right prototype material for the test duration. Paper works for a 48-hour test. Vinyl works for a two-week test. Neither replaces permanent fabrication.
- Place the prototype and observe for at least one full business day before drawing conclusions. Foot traffic patterns vary by hour and day.
- Iterate before you fabricate. Change one variable at a time: the message, the placement, or the size. Changing all three at once makes it impossible to know what worked.
Common pitfalls include testing in ideal conditions only, such as a sunny weekday morning, and ignoring how the sign reads at night or in rain. Another frequent mistake is skipping the storefront signage errors that experienced fabricators flag immediately, like poor contrast ratios or fonts that collapse at distance.
Pro Tip: Run your MVS test during your busiest and slowest periods. A sign that works on Saturday may be invisible on a Tuesday morning when light angles and foot traffic change.
Once your test confirms the message and placement, connect the final design to your brand identity before briefing a fabricator. The sign your building wears is a first impression that runs 24 hours a day.
Key Takeaways
Minimum viable signage is the most cost-effective method for small businesses to validate signage design, message, and placement before committing to permanent fabrication.
| Point | Details |
|---|---|
| MVS definition | The simplest sign that tests customer response before permanent investment. |
| Prototype cost advantage | In-house paper prototypes cost $0.20–$0.40 vs. $200+ for fabricated signs. |
| Design standards matter | Use 1 inch of letter height per 25 feet of viewing distance and limit copy to 5 words. |
| Iterate before fabricating | Test one variable at a time and observe during both busy and slow periods. |
| Scale with confidence | Use MVS data to brief permanent signage that meets ADA standards and fits your brand. |
Why I think most small businesses get signage backwards
Most business owners I have worked with treat their first permanent sign as a branding decision. They spend weeks on fonts and colors, then install a sign that no one reads because the message is too long or the placement is wrong. The sign looks great in the design file and fails in the real world.
MVS flips that sequence. You test the message and the placement first, with almost no money at risk. Then you invest in the permanent version knowing it works. That is not a startup trick. It is just good business practice applied to a physical medium.
The deeper issue is that many owners see signage as a one-time purchase rather than a communication tool that should evolve with their business. A sign that worked when you opened may not work after you add a new product line or change your hours. MVS thinking encourages you to keep questioning whether your signage is still doing its job, even after you have gone permanent.
The businesses that get this right treat their storefront like a testable asset, not a fixed cost. That mindset produces better signs and fewer expensive regrets.
— Nick
Crispsign builds the permanent version your MVS test earns
Once your prototype has proven the message and placement, the next step is a sign built to last. Crispsign produces custom storefront signage fabricated to spec, with faster turnaround times than most traditional sign shops.

From ADA-compliant lobby signs to wayfinding systems and vehicle decals, Crispsign covers the full range of signage a growing business needs. Every product is built for visibility, durability, and brand consistency. If your MVS test has given you a clear winner, Crispsign can turn that prototype into a professional sign your building wears with confidence. Browse the full product range at crispsign.com and get a quote on the sign your storefront has already earned.
FAQ
What is minimum viable signage in simple terms?
Minimum viable signage is the cheapest, simplest sign you can make to test whether a message and placement work before buying a permanent sign. Prototypes can cost as little as $0.20–$0.40 each when printed in-house.
How many words should a viable sign contain?
Effective signage contains 5 words or fewer and must be readable in under 5 seconds. Longer messages lose viewers before they finish reading.
What letter size do I need for my sign to be readable?
Use 1 inch of capital letter height for every 25 feet of viewing distance. A sign read from 100 feet away needs letters at least 4 inches tall.
Does minimum viable signage need to meet ADA standards?
Temporary MVS prototypes are not subject to ADA enforcement, but permanent signage in the U.S. must comply with ADA standards, including tactile characters, Braille, and mounting heights of 48–60 inches above the floor.
When should I move from MVS prototypes to permanent signage?
Move to permanent signage once your prototype has confirmed the message, placement, and size through at least one full cycle of real customer observation. That data makes the fabrication investment defensible.